A constantly running toilet 🚽 wastes water, raises utility bills 💸, and creates nonstop noise throughout your home. Fortunately, learning how to fix a running toilet is easier than most homeowners expect. In many cases, you can solve the problem using simple tools, inexpensive replacement parts, and a little patience.
This guide explains exactly how to diagnose the issue, repair the faulty component, and stop your toilet from continuously running. In addition, you will learn how to prevent future problems and recognize when professional plumbing help may be necessary.
🔍 Understanding the Project
A running toilet usually happens because one of the internal tank components stops working correctly. For example, the flapper may fail to seal, the fill valve may stay open, or the float may sit too high.
When these parts malfunction, water continuously moves from the tank into the bowl. Therefore, the toilet constantly refills itself and wastes water.
Common warning signs include:
- Constant hissing sounds
- Random tank refilling
- Water movement inside the bowl
- Increased water bills
- Weak or incomplete flushing
Ignoring a running toilet can create larger problems over time. For example, continuous water flow can waste hundreds of gallons daily. In addition, neglected leaks may eventually damage internal toilet parts or increase wear on your plumbing system.
Understanding the cause before starting repairs helps you diagnose the issue faster and avoid replacing unnecessary parts..
🧰 Tools & Materials
Before starting, gather these tools and materials:
- Adjustable wrench
- Flathead screwdriver
- Rubber gloves
- Sponge or towel
- Bucket
- Flashlight
- Replacement toilet flapper
- Replacement fill valve
- Cleaning rag
- White vinegar
- Food coloring or leak detection dye (optional leak test)
🛠️ Step-by-Step Guide: How To Fix a Running Toilet
1️⃣ Turn Off the Water Supply
First, locate the shut-off valve behind the toilet near the floor.
Turn the valve clockwise until it stops. Then, flush the toilet to empty most of the tank water.
Next, use a sponge or towel to remove remaining water. This step keeps the work area cleaner and easier to manage.
2️⃣ Inspect the Flapper
The flapper is the most common cause of a running toilet.
Lift the toilet tank lid carefully. Then, look at the rubber flapper at the bottom of the tank.
Check for these common problems:
- Warping
- Cracks
- Mineral buildup
- Poor sealing
- Loose chain connection
If the flapper looks worn or damaged, replace it immediately.
How To Replace the Flapper
- Disconnect the chain from the flush lever.
- Remove the old flapper from the mounting pegs.
- Clean the flush valve seat thoroughly.
- Install the new flapper.
- Reattach the chain with slight slack.
Afterward, turn the water back on and test the flush.
3️⃣ Check the Chain Length
Sometimes the chain causes the toilet to run continuously.
If the chain is too short, the flapper cannot close completely. However, if the chain is too long, it may become tangled underneath the flapper.
Adjust the chain until:
- The flapper closes fully
- The handle moves freely
- The chain has slight slack
Then flush the toilet several times to verify proper operation.
4️⃣ Check the Water Level
Next, inspect the water level inside the tank.
The water should sit about 1 inch below the top of the overflow tube. If the water level is too high, water constantly flows into the overflow tube.
Therefore, the toilet continues running.
How To Adjust the Float
Different toilets use different float systems.
Float Cup Adjustment
Modern toilets often use a float cup.
- Locate the adjustment screw on the fill valve.
- Turn clockwise to lower the water level.
- Flush and retest afterward.
Ball Float Adjustment
Older toilets use a ball float arm.
- Gently bend the arm downward.
- Lower the water level gradually.
- Flush and verify the adjustment.
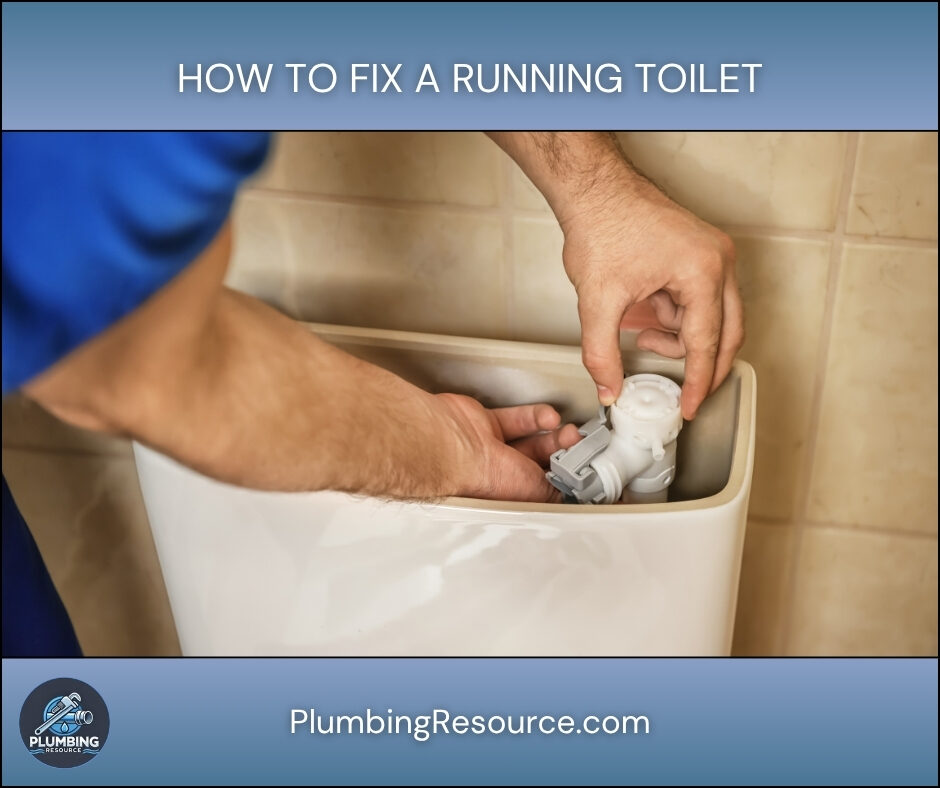
5️⃣ Inspect the Fill Valve
If the toilet still runs, the fill valve may be faulty.
A failing fill valve may:
- Continuously refill the tank
- Make hissing noises
- Leak into the overflow tube
- Fail to shut off completely
How To Replace the Fill Valve
- Turn off the water supply.
- Flush the toilet completely.
- Disconnect the supply line underneath the tank.
- Remove the old fill valve locknut.
- Lift out the old fill valve.
- Install the new valve according to manufacturer instructions.
- Reconnect the water supply line.
- Turn the water back on slowly.
Finally, adjust the float to the correct water level.
6️⃣ Perform a Leak Test
After repairs, test the toilet carefully.
Add a few drops of food coloring into the tank. Then wait 10 to 15 minutes without flushing.
If colored water appears in the bowl, the flapper still leaks. In that case, recheck the flapper alignment and seal.
⚠️ Common Mistakes
Avoid these common mistakes while learning how to fix a running toilet:
- Overtightening plastic nuts
- Installing the wrong flapper size
- Leaving the chain too tight
- Ignoring mineral buildup
- Setting the water level too high
- Forgetting to test for leaks afterward
- Using mismatched replacement parts
In addition, avoid forcing old shut-off valves because they can break unexpectedly.
💡 Pro Tips
- Replace old flappers every few years.
- Clean mineral deposits regularly.
- Keep spare toilet parts at home.
- Use manufacturer-recommended replacement parts whenever possible.
- Test flush the toilet multiple times after repairs.
- Inspect the toilet tank annually for wear.
Furthermore, taking photos before disassembly helps during reinstallation.
🔧 Troubleshooting
Toilet Still Runs After Replacing the Flapper
The flush valve seat may be dirty or damaged.
Clean the sealing surface thoroughly first. However, if the leak continues, replace the flush valve assembly.
Toilet Randomly Refills
A slow tank leak often causes random refilling.
Therefore, perform another food coloring test and inspect the flapper carefully.
Toilet Makes a Hissing Sound
A hissing sound usually indicates a failing fill valve.
Replace the fill valve if adjustments do not stop the sound.
Toilet Handle Feels Loose
Tighten the handle nut inside the tank carefully.
Remember that many toilet handle nuts use reverse threads.
Water Keeps Going into the Overflow Tube
Lower the float adjustment slightly. Then test flush the toilet again.
If the problem continues, replace the fill valve.
👨🏻🔧 When to Call a Professional
Some toilet problems require professional plumbing experience.
Call a licensed plumber if:
- The toilet base leaks
- The tank is cracked
- The shut-off valve fails
- Multiple repairs fail
- Water damage appears nearby
- The toilet constantly clogs and runs
- Corrosion severely damages internal parts
Additionally, a plumber can identify hidden plumbing issues that homeowners may overlook.
❓ FAQ
How To Fix a Running Toilet Without Replacing Parts?
Sometimes you only need to adjust the chain or lower the water level. However, worn components usually require replacement.
Why Does My Toilet Keep Running After Flushing?
The most common causes include a leaking flapper, faulty fill valve, or improperly adjusted float.
How Long Does It Take To Fix a Running Toilet?
Most repairs take 30 to 60 minutes. However, more advanced repairs may take longer.
Can a Running Toilet Increase My Water Bill?
Yes. Even a small toilet leak can waste hundreds of gallons monthly and increase utility costs significantly.
How Do I Know if the Flapper Is Bad?
A damaged flapper may look cracked, warped, or worn. In addition, the toilet may refill randomly throughout the day.
Should I Replace the Fill Valve and Flapper Together?
In many cases, replacing both parts at the same time improves long-term reliability and prevents repeat problems.
✅ Conclusion
Learning how to fix a running toilet can save water, reduce utility costs, and prevent larger plumbing problems. Fortunately, most running toilet issues involve simple repairs that homeowners can complete themselves.
Start by inspecting the flapper, chain, and water level first. Then move to the fill valve if the problem continues. With proper troubleshooting and careful adjustments, you can usually stop a running toilet quickly and confidently.
👋🏼 Before You Go…
If this guide helped you, save this page for future reference and share it with someone dealing with a running toilet problem. A simple repair today can prevent expensive plumbing issues later.