Learning how to replace a bathroom sink drain can save you money and prevent water damage under your sink. Moreover, replacing a drain is usually easier than most homeowners expect when the correct steps are followed carefully.
Bathroom sink drains wear out over time. Consequently, they can begin leaking, corroding, draining slowly, or failing to seal properly. Fortunately, this guide explains every step in deep detail so you can complete the replacement confidently and correctly.
🔍 Understanding the Project
Replacing a bathroom sink drain becomes necessary when the existing drain begins failing. For example, you may notice leaks under the sink, rust around the flange, or a stopper that no longer works correctly.
Older drains often corrode internally. Therefore, water can slowly leak into the vanity cabinet without being noticed immediately. In addition, worn gaskets and cracked washers commonly cause hidden moisture damage over time.
Compatibility also matters before beginning the replacement. Some sinks use overflow drains, while others do not. Consequently, choosing the wrong drain assembly can cause drainage problems or leaks later.
Replacing the drain also improves appearance and functionality. Furthermore, a new drain usually seals better, drains faster, and provides smoother stopper operation.
Common replacement challenges include:
- Tight vanity spaces
- Rusted locknuts
- Misaligned P-traps
- Incorrect drain sizing
- Stubborn old plumber’s putty
Fortunately, these issues can usually be solved with the correct preparation and techniques.
🧰 Tools & Materials
Before you begin, gather everything first because stopping midway slows the project down.
🔧 Tools
- Adjustable wrench
- Channel-lock pliers
- Slip-joint pliers
- Bucket
- Towels or rags
- Flashlight
- Utility knife
- Putty knife
- Basin wrench
- Hacksaw or tubing cutter
🧱 Materials
- New bathroom sink drain assembly
- Plumber’s putty or silicone
- Replacement P-trap washers
- Tailpiece extension (if needed)
- Teflon tape
- Cleaning alcohol
- Paper towels
🛠️ Step-by-Step Guide: How To Replace a Bathroom Sink Drain
1️⃣ Empty the Cabinet Area
First, remove everything from under the sink. Then, place towels and a bucket underneath the drain because leftover water will spill once the trap is disconnected.
Good lighting also helps significantly. Therefore, use a flashlight or portable work light if the vanity area is dark.
2️⃣ Disconnect the Pop-Up Stopper Assembly
Most bathroom sinks use a pop-up drain stopper. Consequently, you must disconnect it before removing the drain.
Locate the horizontal pivot rod behind the drain pipe. Next, unscrew the retaining nut carefully by hand or with pliers. Then, slide the pivot rod out slowly.
Afterward, remove the stopper from inside the sink.
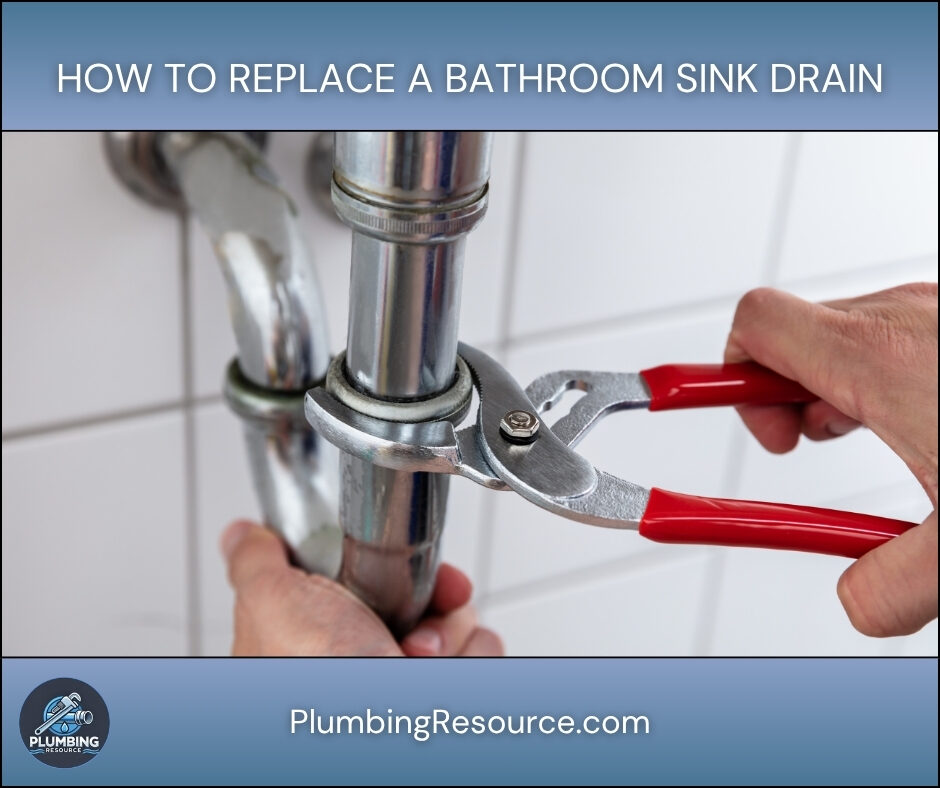
3️⃣ Remove the P-Trap
The P-trap is the curved pipe below the sink. Its job is to hold water and block sewer gases.
Loosen the slip nuts on both sides of the trap. Then, carefully lower the trap into the bucket.
If the nuts are stuck, use pliers gently. However, avoid squeezing plastic fittings too hard because they crack easily.
Inspect the trap while it is removed. In many cases, buildup or corrosion appears inside older drains.
4️⃣ Remove the Old Drain Assembly
Now you can begin the main process of how to replace a bathroom sink drain.
Locate the large locknut underneath the sink drain body. Then, loosen it slowly using channel-lock pliers.
Once the locknut comes off, remove:
- Rubber gasket
- Friction washer
- Backup ring
Next, push the drain upward through the sink opening.
Finally, scrape away all old putty or silicone completely. Clean surfaces matter because leftover debris often causes leaks later.
How To Replace a Bathroom Sink Drain Without Leaks
5️⃣ Clean the Sink Opening Thoroughly
Many drain leaks happen because surfaces were not cleaned properly.
Use a putty knife first. Then, wipe the sink opening with alcohol until it feels smooth and dry.
If old silicone remains, the new drain may not seal correctly. Therefore, take your time during this step.
6️⃣ Apply Plumber’s Putty or Silicone
Roll plumber’s putty into a rope shape. Then, wrap it underneath the drain flange.
Some sinks require silicone instead of putty. For example, stone or composite sinks can stain from certain putties.
Always check manufacturer instructions before applying sealant.
7️⃣ Install the New Drain Body
Insert the drain body through the sink opening carefully.
Then, from underneath the sink:
- Install the rubber gasket
- Add the friction washer
- Thread the locknut onto the drain body
Hold the flange steady from above while tightening below.
Do not overtighten the locknut. Otherwise, porcelain sinks may crack.
8️⃣ Align the Overflow Opening
If your sink has an overflow opening, alignment matters greatly.
Rotate the drain body until the overflow channel lines up correctly. Otherwise, water may drain slowly or leak internally.
This step is commonly missed. However, proper alignment improves drainage performance significantly.
🛠️ Step-by-Step Guide: How To Replace a Bathroom Sink Drain Pop-Up Assembly
9️⃣ Reinstall the Stopper Mechanism
Drop the stopper into the drain opening.
Next, insert the pivot rod through the rear opening until it catches the stopper hole.
Then:
- Tighten the pivot rod nut
- Attach the clevis strap
- Connect the lift rod
- Adjust stopper height
Test the stopper several times afterward.
The stopper should seal tightly when closed. However, it should also lift fully for fast draining.
🔟 Reinstall the P-Trap
Reconnect the P-trap carefully.
Install the washers correctly because backward washers cause leaks immediately.
The tapered side should face the fitting connection.
Hand-tighten first. Then, snug the nuts slightly with pliers.
Avoid overtightening because plastic nuts split easily.
⚠️ Common Mistakes
- Using the wrong drain type
- Forgetting overflow alignment
- Overtightening plastic fittings
- Leaving old putty behind
- Installing washers backward
- Skipping leak testing
- Using too much silicone
- Misaligning the P-trap
- Forgetting to test stopper movement
💡 Pro Tips
- Always dry-fit parts before sealing
- Replace old trap washers during the repair
- Use silicone for stone sinks
- Tighten fittings gradually
- Keep a towel under fittings during testing
- Use food coloring to identify slow leaks
- Test stopper operation repeatedly before finishing
- Clean all threads before assembly
🔧 Troubleshooting
The Drain Leaks Underneath
Usually, the flange seal failed or the locknut is loose.
Remove the drain and reseal it if tightening does not solve the problem.
The Sink Drains Slowly
The overflow may not align properly.
Additionally, the stopper linkage could sit too low inside the drain opening.
The Pop-Up Stopper Does Not Work
Adjust the clevis strap position carefully.
Then, retest the pivot rod movement.
The P-Trap Keeps Dripping
Check washer direction carefully because tapered washers must face the fitting correctly.
Also, confirm the trap lines up naturally without strain.
The Drain Body Spins While Tightening
Hold the top flange securely while tightening underneath.
A helper can also make this process much easier.
👨🏻🔧 When to Call a Professional
Sometimes professional help becomes the better option.
Call a licensed plumber if:
- The sink is cracked
- Pipes are heavily corroded
- The wall drain pipe moves loosely
- Water damage already exists
- The vanity space is extremely tight
- Fittings are seized badly
- The drain pipe inside the wall leaks
A professional can also inspect for hidden plumbing issues before they become expensive repairs.
❓ FAQ
How long does it take to replace a bathroom sink drain?
Most homeowners complete the project within one to two hours. However, older plumbing may require additional time.
Can I replace a bathroom sink drain without replacing the P-trap?
Yes, you can. However, replacing worn trap washers is strongly recommended.
Should I use plumber’s putty or silicone?
Plumber’s putty works well for most sinks. However, silicone is better for many stone or composite sinks.
Why does my bathroom sink drain still leak after installation?
Usually, leaks happen because of poor sealing, crooked washers, or overtightened fittings.
How do I know if my sink has an overflow drain?
Look near the upper inside wall of the sink bowl. If small openings exist, then the sink has an overflow.
What size bathroom sink drain do I need?
Most bathroom sinks use a standard 1-1/4-inch drain assembly. However, always measure before purchasing replacement parts.
✅ Conclusion
Knowing how to replace a bathroom sink drain helps prevent leaks, improve drainage, and extend the life of your plumbing system. Moreover, following the correct installation steps carefully helps ensure a clean, watertight result.
With proper tools, careful alignment, and thorough leak testing, most homeowners can complete this project successfully in a single afternoon.
👋🏼 Before You Go…
If this guide helped you fix your sink, then save it for future reference. Also, share it with someone dealing with a clogged drain.
And if you want more expert plumbing tips, check out more guides on your site to stay ahead of costly problems.