Learning How To Install a Water Filter can improve your home’s water quality and reduce unwanted odors, sediment, and contaminants. In addition, installing the right filtration system can protect plumbing fixtures and provide cleaner drinking water for your family.
Although many homeowners feel intimidated by plumbing projects, most water filter installations are manageable with basic tools and careful preparation. Therefore, this guide explains every step in detail so you can complete the project confidently.
🔍 Understanding the Project
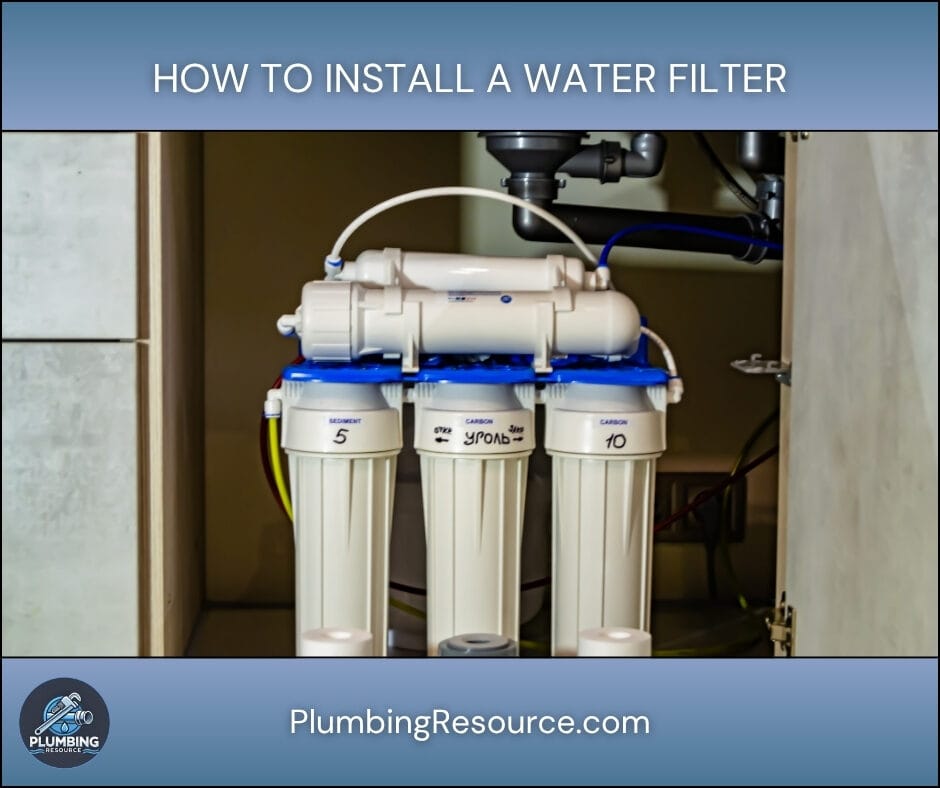
A water filter removes contaminants, sediment, chlorine, and other unwanted particles from your water supply. Because different filtration systems serve different purposes, choosing the correct unit is important before starting installation.
Under-sink filters improve drinking water at a single fixture. However, whole-house filters treat water entering the entire home. Faucet-mounted filters, on the other hand, provide a simple installation option without major plumbing changes.
Proper installation matters because poor connections can cause leaks, pressure loss, or reduced filtration performance. In addition, incorrect placement may shorten filter life or create maintenance difficulties later.
Before you begin, consider these important factors:
- Available installation space
- Pipe material compatibility
- Water pressure requirements
- Filter replacement access
- Existing plumbing condition
Many homeowners also encounter common installation challenges. For example, tight cabinet spaces, corroded shutoff valves, or incompatible fittings can slow the project. Therefore, planning ahead helps avoid unnecessary frustration.
🧰 Tools & Materials
- Adjustable wrench
- Channel-lock pliers
- Bucket
- Towels or rags
- Screwdriver set
- Drill and drill bits
- Utility knife
- Tubing cutter
- PTFE thread seal tape
- Water filter system
- Mounting bracket
- Filter cartridges
- Water supply tubing
- Compression fittings
- Shutoff valve adapter
- Safety glasses
- Flashlight
🛠️ Step-By-Step Guide: How To Install a Water Filter
1️⃣ Choose the Correct Water Filter
First, determine which type of water filter fits your needs and plumbing setup.
Common options include:
- Under-sink water filters
- Faucet-mounted filters
- Refrigerator water filters
- Whole-house filtration systems
Under-sink systems are the most popular because they provide filtered drinking water without affecting the entire plumbing system. However, whole-house systems work better if you want filtered water throughout the home.
Always verify:
- Pipe size compatibility
- Water pressure requirements
- Available cabinet or wall space
- Replacement filter availability
2️⃣ Shut Off the Water Supply
Next, turn off the water supply before disconnecting any plumbing connections.
For under-sink installations:
- Locate the cold-water shutoff valve beneath the sink.
- Turn the valve clockwise until it stops.
- Open the faucet afterward to release remaining pressure.
For whole-house installations:
- Turn off the main water supply to the house.
- Open several fixtures to drain excess pressure from the system.
This step is critical because pressurized water can create a mess or damage surrounding cabinets.
3️⃣ Prepare the Installation Area
Before installing the filter, clear out the work area completely.
Remove cleaning supplies, trash cans, or storage containers from beneath the sink. Then, place towels and a bucket underneath the plumbing connections.
Good lighting also helps tremendously. Therefore, use a flashlight or work light if the cabinet area is dark.
Careful preparation improves visibility and reduces installation mistakes.
4️⃣ Disconnect the Cold Water Supply Line
Locate the flexible cold-water supply line connected to the faucet shutoff valve.
Using an adjustable wrench:
- Loosen the compression nut carefully.
- Allow any remaining water to drain into the bucket.
- Inspect the supply line for corrosion or damage.
If the line appears worn or brittle, replace it during the installation process. Although this adds a few minutes, it can prevent future leaks.
5️⃣ Install the Water Supply Adapter
Most water filter kits include a tee adapter or feed valve.
Install the adapter between:
- The shutoff valve
- The faucet supply line
Apply PTFE tape to threaded connections if recommended by the manufacturer. Then, tighten the fittings securely without overtightening them.
Overtightening may crack fittings or damage rubber seals. Therefore, tighten only until snug and leak-resistant.
6️⃣ Mount the Filter Housing
Now mount the filter housing inside the cabinet or on a nearby wall.
Choose a location that provides:
- Easy filter access
- Adequate clearance underneath
- Minimal tubing bends
Hold the bracket in place and mark the mounting holes. Then, drill pilot holes and secure the bracket with screws.
Proper placement matters because cramped installations make future filter replacements difficult.
7️⃣ Connect the Water Tubing
Next, connect the inlet and outlet tubing to the filtration system.
Most modern systems use quick-connect fittings. Therefore, push the tubing firmly into each port until fully seated.
Common tubing connections include:
- Water supply to filter inlet
- Filter outlet to faucet
- Additional stages between filters
Avoid sharp bends or kinks because restricted tubing reduces water flow.
8️⃣ Install the Dedicated Faucet
Many under-sink systems include a separate drinking water faucet.
If your sink already has an unused hole, installation becomes easier. However, some countertops require drilling a new opening.
To install the faucet:
- Insert the faucet through the mounting hole.
- Secure the mounting hardware underneath.
- Connect the outlet tubing to the faucet stem.
- Tighten connections carefully.
Make sure the faucet sits straight before final tightening.
9️⃣ Insert the Filter Cartridge
Open the filter housing and insert the cartridge according to the manufacturer’s instructions.
Some filters install vertically, while others require a specific orientation. Therefore, pay close attention to directional markings.
Before reassembling:
- Inspect the O-ring
- Ensure proper seating
- Lubricate the seal if recommended
A damaged or twisted O-ring commonly causes leaks after installation.
1️⃣0️⃣ Turn the Water Back On
Slowly reopen the water supply valve after all connections are complete.
Do not turn the valve on too quickly. Instead, allow the system to fill gradually.
As pressure builds:
- Inspect every fitting
- Check the housing seal
- Watch for drips
- Listen for unusual sounds
If leaks appear, shut the water off immediately and correct the connection.
1️⃣1️⃣ Flush the Water Filter
Most new filters require flushing before use.
Open the filtered water faucet and allow water to run for several minutes. This process removes:
- Air pockets
- Carbon dust
- Manufacturing residue
Initially, cloudy water is normal because trapped air exits the system.
Always follow the manufacturer’s flushing instructions for best results.
1️⃣2️⃣ Test Water Flow and Operation
Finally, test the system completely.
Check for:
- Strong water flow
- Consistent pressure
- Proper filtration operation
- Leak-free connections
Then, verify that all mounting hardware remains secure.
Once everything operates correctly, clean the work area and store any extra parts or instructions for future maintenance.
⚠️ Common Mistakes
- Overtightening compression fittings
- Forgetting to flush the filter
- Installing tubing with sharp bends
- Mounting the filter without enough clearance
- Using the wrong pipe adapter
- Ignoring damaged shutoff valves
- Installing filters backward against flow direction
💡 Pro Tips
- Label the installation date on the filter housing.
- Keep replacement cartridges nearby for easier maintenance.
- Install a small shutoff valve near the filter for easier servicing.
- Use flexible braided supply lines when possible.
- Replace old shutoff valves during installation if corrosion exists.
- Take photos before disassembly for easier reconnection.
🔧 Troubleshooting
Water Pressure Is Low
Check for kinked tubing or partially closed shutoff valves. In addition, verify the filter cartridge is seated correctly.
Water Tastes Strange
Flush the system longer because new carbon filters often release harmless carbon particles initially.
Filter Housing Leaks
Inspect the O-ring carefully. Then, ensure it sits evenly before tightening the housing again.
Tubing Will Not Stay Connected
Cut the tubing squarely and push it fully into the quick-connect fitting.
Faucet Drips Constantly
Check the faucet connection and verify all mounting hardware is tightened evenly.
👨🏻🔧 When to Call a Professional
You should contact a licensed plumber if:
- The main water shutoff does not work
- Plumbing lines are heavily corroded
- You need to cut copper piping
- The installation requires electrical connections
- You experience repeated leaks
- Water pressure problems continue afterward
Whole-house filtration systems also often require advanced plumbing modifications. Therefore, professional installation may prevent costly mistakes.
❓ FAQ
How To Install a Water Filter under a kitchen sink?
First, shut off the cold-water supply. Then, install the feed adapter, mount the filter housing, connect tubing, and flush the system afterward.
How long does it take to install a water filter?
Most under-sink water filters take between one and three hours to install, depending on plumbing conditions.
Can you install a water filter without a plumber?
Yes, many homeowners install under-sink and faucet-mounted filters themselves using basic plumbing tools.
How often should water filters be replaced?
Most filters require replacement every three to twelve months. However, replacement frequency depends on water quality and usage.
What is the best location for a water filter?
Under-sink systems work best near the kitchen faucet. Whole-house systems, however, should install near the main water entry point.
✅ Conclusion
Understanding How To Install a Water Filter helps improve your home’s water quality and plumbing performance. Because proper preparation and careful installation matter, following each step closely can prevent leaks and future maintenance issues.
Whether you install an under-sink filter or a whole-house system, the right setup provides cleaner and better-tasting water throughout your home.
👋🏼 Before You Go…
If this guide helped you, save it for future reference and share it with someone planning a plumbing upgrade. In addition, check out our other plumbing tutorials for more step-by-step home improvement guides.


