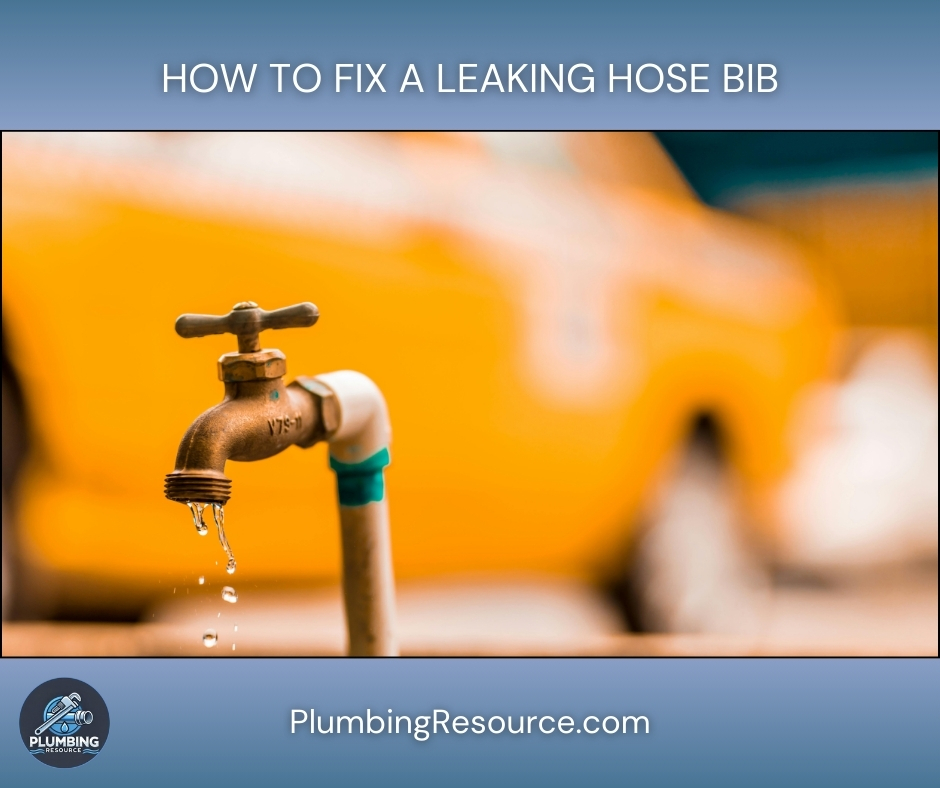
A leaky hose bib (also called an outdoor faucet, spigot, or sillcock) may seem minor, but it can waste a lot of water, raise your bill, and cause hidden damage to walls and foundations. In this guide, I’ll walk you through every common type of hose bib leak and show you exactly how to fix each one.
We’ll cover:
- Drips from the spout
- Leaks around the handle when it’s turned on
- Spraying or leaking from the vacuum breaker (backflow preventer)
- Leaks at the wall or behind the siding
- Freeze-damaged frost-free hose bibs
- When you should replace the entire valve instead of repairing it
By the end, you’ll understand what’s going on inside the hose bib and how to safely repair or replace it.
1. Safety First: Before You Touch the Hose Bib
Even though this is a small plumbing job, treat it with respect. Water under pressure can surprise you, and outdoor faucets are often attached to finished walls.
1.1 Safety Precautions
- Know where the main shut-off is.
Find your main water shut-off inside the house (often near where the water line enters, near a water heater, or in a utility room). You need to be able to shut it off quickly if something goes wrong. - Wear basic protection.
- Safety glasses (to protect from sudden sprays or debris).
- Work gloves (to protect your hands from sharp metal, rough brick, or hot surfaces if it’s sunny).
- Watch for electrical hazards.
If the hose bib is near an outdoor outlet, light, or electrical box, be careful with water sprays. Do not let water spray into electrical fixtures. - Be cautious in freezing weather.
Working on plumbing in very cold weather can cause brittle parts or sudden breaks. If possible, choose a mild day.
2. Identify Your Hose Bib Type and the Leak Location
Not all hose bibs are built the same. Repair steps depend on what you have.
2.1 Common Hose Bib Types
- Standard Compression Hose Bib
- Handle turns multiple times to open/close.
- Uses a rubber washer at the end of a stem to stop water.
- Usually older or basic installations.
- Frost-Free (Frost-Proof) Sillcock
- Long body that extends inside the wall.
- Designed so the actual shut-off point is inside the heated space, reducing freeze risk.
- Handle usually looks similar to a standard hose bib, but the body is much longer.
- Quarter-Turn Ball Valve Hose Bib
- Handle turns only 90° (quarter turn) to fully open or close.
- Uses a ball valve inside with seals.
- Often newer and smoother to operate.
2.2 Where Is It Leaking?
Look closely and note exactly where you see water:
- From the spout (where the hose attaches) even when off → usually a worn washer or internal seal.
- Around the handle stem when water is on → usually a packing nut or packing material issue.
- From the vacuum breaker / backflow preventer on top → internal O-ring or check seal issue.
- At the wall, behind the siding, or dripping inside → possible freeze damage, split pipe, or loose connection.
- Spraying from cracks in the body → the hose bib itself is split and must be replaced.
Write down what you observe; it will guide which repair path you follow.
3. Tools and Materials You May Need
You won’t need everything on this list for every repair, but it’s helpful to gather what you can before starting.
3.1 Basic Tools
- Adjustable wrench (8–10″)
- Set of open-end/box wrenches (for packing nut, stem)
- Screwdrivers (flathead and Phillips)
- Channel-lock pliers
- Utility knife
- Flashlight or headlamp
3.2 Common Materials
- Replacement hose bib washer(s) (sized to your stem)
- Replacement hose bib stem (optional, if existing stem is worn/corroded)
- Packing string or graphite/PTFE packing (for handle stem leaks)
- PTFE (Teflon) tape for threaded connections
- Pipe joint compound (optional, for extra seal on threads)
- Replacement hose bib (if you’re swapping the whole valve)
- For soldered/copper connections:
- Torch, solder, flux, emery cloth, heat shield (only if you’re comfortable and qualified)
- For threaded connections:
- Correct fittings/adapters (male/female adapters, etc.)
- For PEX:
- PEX crimp or push-fit fitting compatible with your pipe
If you’re not experienced with soldering or modifying existing piping, don’t worry. I’ll give you a path that still lets you succeed or clearly shows you when it’s better to call a professional.
4. Step-by-Step: Tightening the Packing Nut (Handle Leak)
If water leaks around the handle while the faucet is on, the packing around the stem is likely loose or worn.
4.1 Shut Off and Prepare
- Turn off the water supply feeding that hose bib.
- If there’s a dedicated shut-off inside your home just for that line, close it.
- If not, shut off the main water supply.
- Open the hose bib fully to relieve pressure and drain remaining water.
- Check the packing nut.
- The packing nut sits just behind the handle, around the stem.
- It’s usually a small hex nut.
4.2 Try a Gentle Tightening First
- Using an adjustable wrench, turn the packing nut clockwise about 1/8 to 1/4 turn.
- Close the hose bib, turn the water supply back on, and then open the hose bib again to test.
- Watch the stem closely.
- If the leak stops, you’re done.
- If it still leaks, you either need more tightening (carefully) or new packing.
Caution: Don’t over-tighten. Too much pressure can make the handle hard to turn or damage the stem.
4.3 Repacking the Stem
If tightening didn’t fix it:
- Turn off the water supply again and open the hose bib to relieve pressure.
- Remove the handle.
- Unscrew the screw holding the handle, slide off the handle.
- Loosen and remove the packing nut.
- Carefully back it off the stem; set it aside.
- Remove old packing material.
- It may look like string, Teflon, or a crumbling ring.
- Use a pick or small screwdriver gently; avoid scratching the stem.
- Wrap new packing.
- Wrap packing string around the stem, just behind where the packing nut will sit.
- Usually 2–3 wraps are enough, snug but not bulky.
- Reinstall the packing nut.
- Thread it back on and snug it down finger-tight, then add a small turn with the wrench.
- Reinstall the handle and screw.
- Turn on water, test again.
- Open the hose bib. If no leak appears around the stem, the packing repair worked.
- If there’s still a small seep, tighten the packing nut another tiny amount.
5. Fixing a Drip from the Spout (Washer or Internal Seal)
If the hose bib drips from the spout even when fully off, it’s usually a worn washer or internal seal. This is common on standard compression hose bibs.
5.1 Remove the Stem
- Shut off the water supply and open the hose bib to relieve pressure.
- Remove the handle screw and pull off the handle.
- Loosen and remove the packing nut.
- Unscrew the stem assembly from the valve body.
- Use a wrench on the flats behind the stem (where the body meets the stem).
- Turn counterclockwise (viewed from outside) to remove the whole stem.
You may need to unscrew several turns before the stem slips out completely.
5.2 Inspect and Replace the Washer
- Look at the end of the stem.
- You will see a rubber or neoprene washer held by a screw.
- If it’s cracked, worn, hardened, or distorted, that’s your problem.
- Remove the screw and old washer.
- Take the stem or washer to a hardware store if needed to match size and type.
- Install the new washer and tighten the screw snug but not over-tight.
5.3 Inspect the Valve Seat
Inside the hose bib body is the seat where the washer presses to stop water.
- Shine a flashlight into the body.
- Check for deep grooves, pitting, or rough spots.
If the seat is badly damaged, the new washer may not seal perfectly. Some hose bibs have replaceable seats; others do not.
- If the seat is replaceable, you can use a seat wrench to remove and replace it.
- If not, and the seat is badly damaged, replacing the entire hose bib is usually the best long-term solution.
5.4 Reassemble and Test
- Slide the stem back into the body and thread it in.
- Reinstall the packing nut (snug it but don’t overtighten).
- Reinstall the handle and screw.
- Close the hose bib (turn handle fully off).
- Turn the water supply back on.
- Check for drips from the spout.
- If it still drips a bit, gently tighten the packing nut and fully close the valve again.
- If dripping persists even with a new washer and good seat, the valve body might be worn; consider replacing the hose bib.
6. Fixing Leaks at the Vacuum Breaker / Backflow Preventer
Many hose bibs have a vacuum breaker (backflow preventer) on top. When it fails, you may see:
- Water spraying or dripping from the small holes or cap on top when the hose is pressurized.
- Water leaking around the vacuum breaker connection.
6.1 Determine If It’s Removable
Some vacuum breakers are:
- Threaded on: You can unscrew and replace them.
- Built-in / Integrated: They’re part of the faucet body and not intended to be removed.
If yours is threaded:
- Shut off the water and open the hose bib to relieve pressure.
- Use an adjustable wrench to unscrew the vacuum breaker from the top.
- Take it to the store and purchase a matching replacement vacuum breaker (same thread type/size).
- Wrap threads with PTFE tape, screw on the new vacuum breaker, and snug it down.
If it’s integrated and failed badly, the entire hose bib may need replacement, as internal parts aren’t always serviceable.
7. Addressing Leaks at the Wall or Inside the House
If you see:
- Water coming out around the siding or brick when the hose bib is on, or
- Dampness or water stains inside the wall near the hose bib location,
this indicates a leak behind the wall.
7.1 Common Causes
- Loose threaded connection where the hose bib connects inside.
- Split pipe or fitting due to freezing.
- Cracked body on a frost-free hose bib inside the wall.
7.2 Immediate Steps
- Turn off the main water supply immediately.
- Do not use the hose bib until the problem is found and fixed.
- If you see water inside the house:
- Place a bucket under drips.
- If water is pooling, you may need to open drywall to allow the wall cavity to dry.
7.3 Investigating the Source
This often requires going inside the home where the hose bib penetrates the wall. You may need to:
- Remove an access panel, or
- Cut a small inspection hole in the drywall.
Look for:
- The pipe connecting to the hose bib.
- Any fittings, solder joints, or threaded connections.
- Visible splits or cracks.
Note: If you’re not comfortable opening walls or working on internal piping, this is an appropriate time to call a licensed plumber. Hidden leaks can cause serious damage and mold growth.
8. Replacing the Entire Hose Bib (Threaded, Soldered, and PEX)
Sometimes, the best fix is a full replacement: the body is cracked, threads are corroded, or multiple parts are failing.
8.1 Confirm the Connection Type
From inside the house (or at the point where the pipe meets the hose bib):
- Threaded connection:
The hose bib has male threads that screw into a female fitting (or vice versa). Easy to replace with basic tools. - Soldered (sweat) connection:
Copper pipe is soldered directly or via a fitting to the hose bib. Requires torch and soldering skill. - PEX or CPVC connection:
Hose bib connects to plastic or PEX via crimp, clamp, or threaded adapter.
If you are not experienced with soldering or cutting into plumbing, I recommend:
- Using a threaded or push-fit adapter for copper/PEX when possible, or
- Hiring a professional if you’re unsure.
8.2 General Replacement Steps (Threaded Hose Bib)
- Turn off water and open the hose bib to relieve pressure.
- From outside, use an adjustable wrench to unscrew the hose bib counterclockwise.
- If it’s stuck, apply penetrating oil and allow time, but avoid twisting so hard you damage the inside piping.
- Once removed, clean the threads in the wall fitting if accessible.
- Prepare the new hose bib:
- Wrap the threads with PTFE tape (3–4 wraps) in the same direction as tightening.
- Optionally apply a thin layer of pipe joint compound over the tape.
- Thread the new hose bib into the fitting.
- Start by hand to avoid cross-threading.
- Tighten with a wrench until snug and oriented correctly (spout pointing downward).
- Turn water back on and test:
- Check for leaks at the connection, around the body, and at the spout and handle.
- If a slight drip appears at threads, tighten slightly more-do not overtighten.
8.3 Replacing a Frost-Free Sillcock
Frost-free hose bibs are typically longer, and replacement is similar to threaded, but:
- You must ensure the new frost-free sillcock is the same length (so it reaches the interior connection).
- The slight downward pitch toward the outside must be maintained so water drains out, not back into the wall.
Steps are similar to threaded replacement, but you may have to:
- Disconnect inside at a threaded union, solder joint, or PEX connection.
- Install the new sillcock and re-connect with compatible fittings.
If the current installation is soldered and you’re not comfortable using a torch, a plumber can convert the connection to a threaded or push-fit style for easier future repairs.
9. Special Scenario: Freeze Damage and Prevention
A very common cause of hose bib leaks is freeze damage.
9.1 Signs of Freeze Damage
- Split or cracked body on the hose bib.
- Water pouring from behind the wall when turned on.
- A frost-free hose bib that suddenly leaks inside the wall even though it’s “frost-free.”
Often, this happens when:
- A hose was left connected in winter, trapping water in the faucet.
- The valve was not pitched correctly to drain water out.
The fix is usually replacement of the frost-free sillcock and sometimes adjacent piping.
9.2 How to Prevent Future Freeze Damage
- Always disconnect hoses before freezing weather.
- Turn off the interior shut-off (if you have one) and open the hose bib to drain.
- Consider installing:
- A frost-free hose bib if you don’t have one.
- An interior shut-off valve with a drain port for easier winterization.
10. When to Call a Professional
DIY hose bib repairs are very achievable, but there are times when calling a plumber is the smartest move:
- You see or suspect hidden leaks in the wall or ceiling.
- The hose bib is soldered and you’re not comfortable with a torch.
- You cannot remove the old hose bib without twisting the pipe inside.
- You have multiple hoses, irrigation systems, or backflow requirements that must meet local plumbing codes.
- Water damage, mold, or structural issues are visible.
A professional can replace the faucet, repair hidden piping, and ensure everything is code-compliant and safe.
11. Final Checklist After Your Repair
Before you call the job done, go through this quick checklist:
- Handle area dry?
- No leaks around the stem or packing nut when water is on.
- Spout sealed properly?
- No dripping when the hose bib is fully off (give it a few minutes).
- Vacuum breaker functioning?
- No steady dripping from the top when the hose is pressurized.
- Occasional short drip right after shut-off can be normal.
- No leaks at the wall or inside?
- Check inside the home at the hose bib location after running the faucet for several minutes.
- Hose removed before freezing weather?
- If it’s near winter, disconnect your hose now and get into the habit.
If everything is dry and working smoothly, you’ve successfully fixed your leaky hose bib and protected your home from wasted water and potential damage.