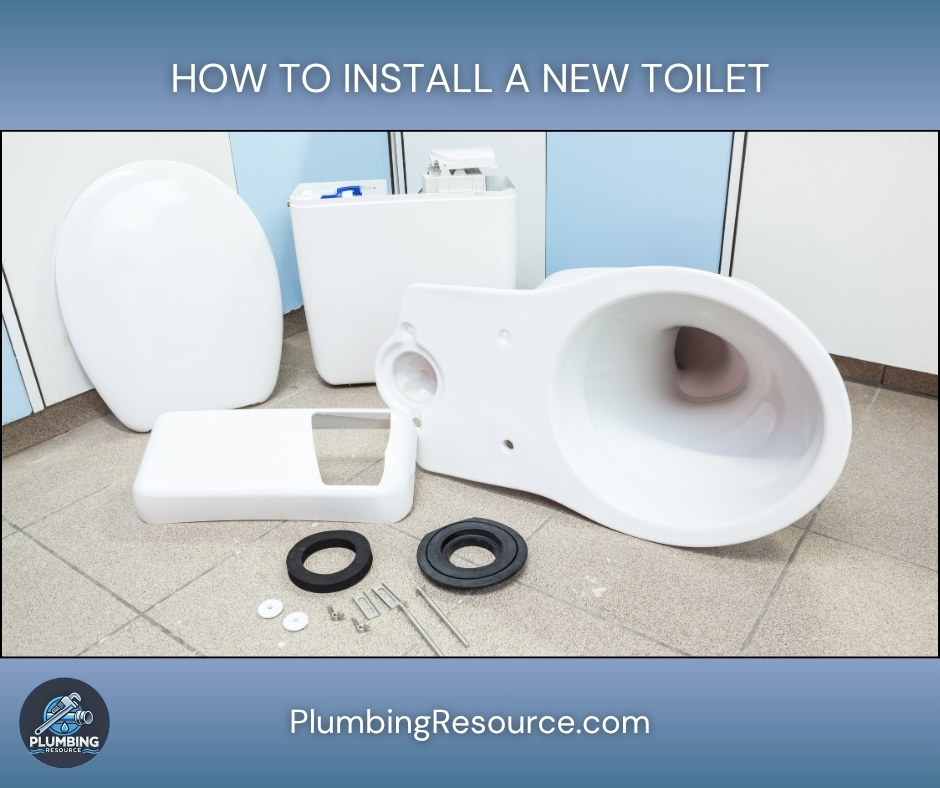
Before You Begin: Scope, Safety, and Success Criteria
- Scope: This guide covers replacing or installing a standard floor-mounted, gravity-flush, two-piece or one-piece toilet on a standard 12″ rough-in with a floor flange.
- Out of scope but noted: Wall-hung toilets, pressure-assist models, macerating/Upflush units, and 10″/14″ rough-ins require brand-specific steps and specialty parts.
- Safety first: Always shut off water, wear gloves and eye protection, and lift with help to avoid back injuries and porcelain cracks.
- Success criteria: The toilet sits level with no rocking, all joints are dry after tests, the tank fills and shuts off properly, and the bowl flushes cleanly.
Tools & Materials Checklist
Tools: Adjustable wrench, deep-well socket set, flat and Phillips screwdrivers, small hacksaw (for bolt trim), utility knife, tape measure, torpedo level, putty knife, rags, sponge, bucket, shop vacuum (optional), silicone caulk gun.
Materials: New toilet (bowl + tank or one-piece), new braided stainless supply line (3/8″ compression to 7/8″ ballcock), closet bolts with caps, wax ring or waxless seal, plastic or composite shims, toilet flange repair ring/extender (if needed), 100% silicone caulk (bath), leak detection dye, paper towels.
Optional upgrades: New 1/4-turn angle stop (shutoff valve), braided line with integrated ballcock washer, tank bolt kit with rubber/metal washers, rigid supply escutcheon.
Step 1: Verify Compatibility and Rough-In
- Measure the rough-in correctly. Place your tape from the finished wall (not baseboard) to the center of the flange bolts or the center of the drain. Therefore, confirm 12″ typical; however, note some homes use 10″ or 14″.
- Check clearance. Open the box and measure the toilet’s tank depth and bowl projection; therefore, confirm door swing, vanity clearance, and code-compliant space (at least 15″ from centerline to each side wall and at least 24″ clear in front).
- Confirm height and seat style. Choose standard (~15″) or “comfort/ADA” height (~17–19″); consequently, match household needs.
- Scan the floor condition. Probe around the flange; therefore, repair soft subfloor now, not later.
Step 2: Prep the Area and Remove the Old Toilet (if replacing)
- Shut off water at the angle stop; then flush to empty the tank.
- Sponge out remaining water from tank and bowl; then disconnect the supply line at the tank.
- Pop the caps and loosen nuts on the closet bolts; then rock the bowl gently to break the wax seal.
- Lift the toilet with help (or separate tank/bowl on two-piece units), and therefore carry it onto a trash bag or cardboard.
- Scrape old wax from the flange using a putty knife; then stuff a rag in the drain to block sewer gas.
- Assess the flange. Check that it sits flush to 1/4″ above finished floor; consequently, plan an extender if it’s low, or a repair ring if cracked.
- Remove the old supply line and consider replacing the angle stop if it’s sticky, corroded, or weeping.
Step 3: Fix the Flange Now (Not After)
- If the flange is low: Use a flange extender kit to raise it to floor level; consequently, follow manufacturer spacers and screws.
- If the flange is cracked: Add a stainless repair ring anchored into the subfloor; therefore, align the bolt slots at 3 and 9 o’clock.
- If the subfloor is soft: Replace the damaged section and re-anchor the flange; thus, ensure it’s solid so the toilet won’t rock.
Step 4: Set Closet Bolts and Choose the Right Seal
- Install closet bolts into the ring slots; then capture each with the provided plastic washers so they stand upright.
- Choose your seal wisely:
- Standard wax ring: Reliable and inexpensive; therefore, choose extra-thick or stack wax + plastic horn only when the flange is low.
- Waxless seal: Clean, repositionable, and great for cold rooms; consequently, ideal for tight spaces and for future service.
- Position the seal:
- Wax: Press onto the bowl outlet (my pro preference) instead of the floor; therefore, reduce misalignment.
- Waxless: Assemble per instructions and set onto flange or bowl as directed.
Step 5: Dry-Fit the Bowl and Shim for Rock-Solid Support
- Do a dry fit first. Lower the bowl over the bolts without the seal; then check left-right centering and wall clearance.
- Level front-to-back and side-to-side using a torpedo level; consequently, locate shim positions to eliminate rocking.
- Mark shim spots lightly on the floor; then lift the bowl back up.
Step 6: Set the Bowl for Real
- Remove the rag from the drain; then set the seal exactly as planned.
- Lower the bowl straight down over the bolts; therefore, avoid twisting so you don’t smear wax.
- Seat the bowl by body weight. Press down firmly, front then back, and left then right; consequently, engage the seal evenly.
- Add washers and nuts to the bolts; then snug each side alternately, a few turns at a time.
- Stop at “snug-plus.” Porcelain cracks if over-tightened; therefore, aim for secure without strain.
- Check level again and insert the planned shims until all rocking disappears; then trim shims later after caulking.
- Trim the bolts with a hacksaw only if needed and snap on caps.
Step 7: Mount the Tank (Two-Piece Toilets)
- Assemble tank bolts with rubber washer inside the tank, then metal washer and nut outside; therefore, avoid leaks.
- Set the tank-to-bowl gasket on the flush valve; then lower the tank onto the bowl posts.
- Tighten both bolts evenly. Alternate side-to-side until the tank is stable and nearly touches the bowl pads; consequently, do not over-crush the gasket.
(For one-piece toilets, skip this step.)
Step 8: Connect the Water Supply
- Install a new braided stainless line from the 1/4-turn angle stop to the tank’s fill valve shank; therefore, avoid reusing old lines.
- Hand-tighten both ends and add a small wrench tweak; consequently, don’t overtighten plastic fill valve threads.
- Open the stop slowly and let the tank fill; then watch the joints for weeps.
Step 9: Calibrate the Fill Valve and Flapper
- Set the waterline to the tank’s “WATER LINE” marking using the fill valve’s height or float adjustment; therefore, ensure proper flush volume.
- Check the flapper chain slack so it lifts fully without binding and doesn’t hold the flapper open; consequently, leave ~1/4″ slack.
- Test a flush and confirm a strong siphon with a clean bowl rinse.
Step 10: Caulk the Base Correctly
- Dry everything around the base; then run a continuous silicone bead along the front and sides.
- Leave a small gap at the back as an inspection point; therefore, future leaks show up visibly.
- Tool the bead with a damp finger or caulk tool; then wipe clean edges.
Step 11: Final Leak Tests (Tank, Bowl, and Floor)
- Paper towel test: Wipe every joint—the supply, the tank bolts, the fill valve locknut, and the base; therefore, look for fresh moisture.
- Dye test: Add a few drops of blue food dye to the tank; then wait 10–15 minutes. If bowl water tints, consequently the flapper leaks.
- Bucket test: Pour a gallon around the rim into the bowl (not tank); therefore, confirm no base seepage.
- Overnight check: Inspect the floor and the back caulk gap the next morning; consequently, verify a dry installation.
Special Situations and Pro Tips
- Flange below floor: Prefer a flange extender or extra-thick wax; however, avoid stacking multiple regular wax rings without a horn.
- Rocking bowl on uneven tile: Use hard plastic shims rather than soft wood; consequently, trim flush after caulking.
- Old or stuck angle stop: Replace it now with a 1/4-turn valve; therefore, shutoffs are reliable for future maintenance.
- Short rough-in (10″) or long (14″): Choose a matching toilet or a model with adjustable footprint; consequently, avoid tank-to-wall collisions.
- Condensation (“sweating” tank): Consider insulated tanks or mixing valves in humid rooms; therefore, reduce drips.
- Offset flanges: Use an offset flange only if needed; however, expect slightly reduced flush performance.
- Skirted/concealed-trap toilets: Use manufacturer-specific side-mounting kits; consequently, follow their template for bolt placement.
- Seat install: Tighten seat bolts until the seat stays centered under load; therefore, avoid cracking plastic hinges.
- Disposal: Double-bag old wax, tape the bowl and tank together for transport, and check local rules for porcelain disposal; consequently, keep things clean and compliant.
Quality Checklist (Run This Before You’re Done)
- The toilet is level and doesn’t rock.
- The tank waterline matches the mark.
- The fill valve shuts off without hissing.
- The flapper seals and passes the dye test.
- All joints, bolts, and the base gap are dry.
- The caulk bead is neat with an inspection gap at the back.
- The seat is centered and tight.
- The supply stop operates smoothly.
Troubleshooting Quick Table
- Slow fill or constant hiss: Adjust or replace fill valve; therefore, clean debris from the cap and refill tube.
- Phantom flushes: Replace flapper; consequently, clean the flapper seat.
- Water at base after flush: Re-shim and re-set with new seal; therefore, inspect flange height and integrity.
- Tank wobble: Even-out tank bolt tension; consequently, ensure pads contact.
- Weak flush: Raise waterline to mark, verify rim holes are clear, and confirm full flapper lift; therefore, restore performance.