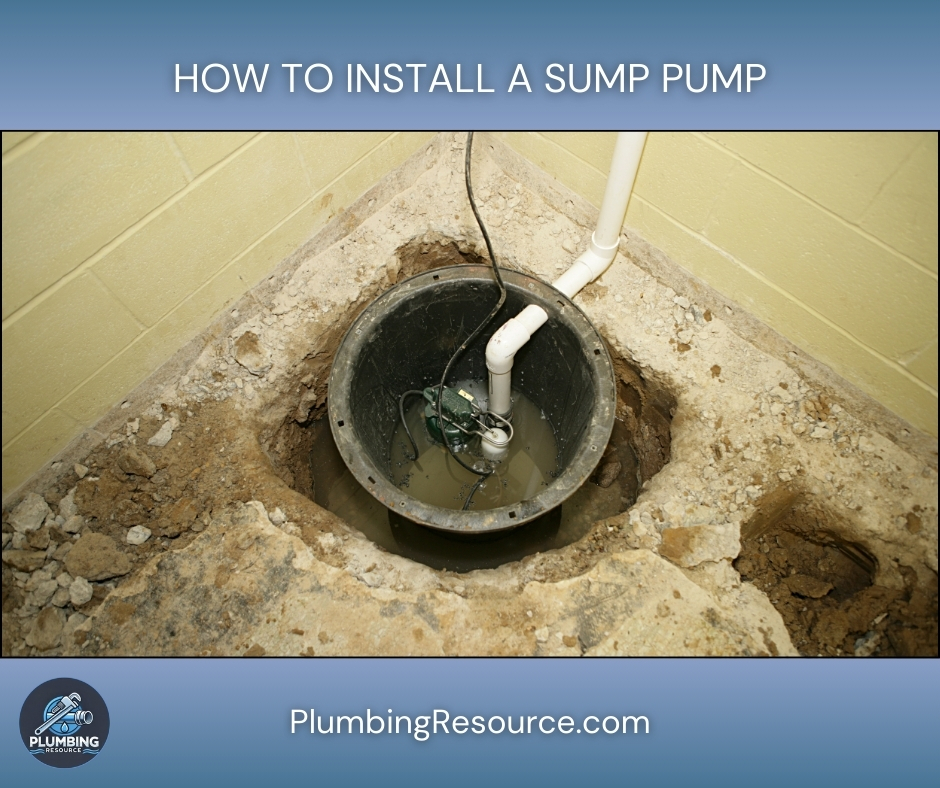
A properly installed sump pump can be the difference between a dry, safe basement and a musty, moldy, flood-prone mess. In this guide, I’ll walk you through the entire process of installing a sump pump like a professional plumber would: step-by-step, with detailed explanations, safety notes, and options for different situations.
We’ll cover:
- Replacing an existing sump pump
- Installing a pump in an existing pit
- Installing a brand-new pit and pump where none exists
- Adding a check valve and discharge line
- Optional upgrades like battery backup systems
Throughout the guide, I’ll point out when a job crosses into “call a licensed pro” territory-especially around electrical and structural work.
Step 1: Understand What a Sump Pump System Does
Before you touch tools, it helps to understand the system you’re working with.
A typical sump pump system includes:
- Sump pit (basin)
- A perforated plastic pit buried below floor level where groundwater collects.
- Usually 18–24 inches in diameter and about 24–30 inches deep.
- Sump pump (submersible or pedestal)
- Submersible: Sits inside the pit and is fully underwater when running; quieter and more common in finished basements.
- Pedestal: Motor sits above the pit with only the intake in the water; easier to service but louder.
- Float or sensor switch
- Turns the pump on and off based on water level.
- Discharge pipe
- Usually 1 1/2″ or 2″ PVC that carries water out of the house and away from the foundation.
- Check valve
- One-way valve on the discharge line to keep pumped water from flowing back into the pit when the pump shuts off.
- Power supply
- Standard 120V grounded outlet.
- Optional battery backup or secondary pump for power outages.
Step 2: Safety, Codes, and When to Call a Pro
Safety First
- Electricity and water do not mix.
- Always work with dry hands and shoes.
- Use a GFCI outlet for the pump.
- If any part of the electrical system looks questionable, call an electrician.
- Protective gear:
- Safety glasses
- Hearing protection if cutting/breaking concrete
- Dust mask or respirator when cutting concrete
- Gloves
- Structural concerns:
- If you’re cutting a new pit into a slab, be aware of possible structural issues, especially near load-bearing walls. When in doubt, consult a structural or foundation professional.
Code & Local Rules
Every area has its own rules about:
- Where you can discharge water (usually not into the sanitary sewer).
- How far from the foundation discharge must be (often 5-10 feet minimum).
- Backflow prevention requirements.
Always check local plumbing and building codes or call your city building department before you start.
Step 3: Gather Tools and Materials
Tools You May Need
For all installations:
- Tape measure
- Permanent marker
- Utility knife
- Level
- Adjustable wrench or channel-lock pliers
- PVC cutter or hacksaw
- Drill with bits (for discharge line penetration)
- Screwdriver
- Shop-vac or bucket and sponge
For new pit in concrete slab:
- Hammer drill with masonry bit
- Concrete saw or circular saw with masonry blade or
- Electric jackhammer or rotary hammer with chisel
- Sledgehammer and cold chisel (for smaller jobs)
- Wheelbarrow or buckets for debris
Materials
- Sump pump (submersible or pedestal, appropriately sized)
- Pre-formed sump pit (basin) with lid
- Gravel/pea stone (about 1-2 bags, depending on pit size)
- 1 1/2″ or 2″ PVC pipe (check pump outlet size)
- PVC fittings:
- 90° elbows
- 45° elbows
- Couplings
- Unions (optional, for easy removal)
- PVC primer and cement
- Sump pump check valve (matching pipe size)
- Pipe straps or clamps
- Silicone or polyurethane sealant (for wall penetration)
- Electrical cord clips or cable ties
- Grommet or sleeve where pipe passes through the wall
- Optional:
- Battery backup sump pump system
- Alarm (audible or Wi-Fi) to alert you if water rises too high
Step 4: Choose Pump Type and Size
Submersible vs. Pedestal
Submersible Pump (Most Common):
- Pros:
- Quieter
- Covered pit = safer and cleaner look
- Better for finished basements
- Cons:
- Slightly more expensive
- Harder to access without removing the pit cover
Pedestal Pump:
- Pros:
- Easier to service and replace
- Usually cheaper
- Cons:
- Louder
- More exposed equipment
- Less aesthetically pleasing
Sizing the Pump
Pump capacity is typically measured in gallons per hour (GPH) at a given “head” (height it pumps water). General guidelines:
- Light groundwater: 1/3 HP pump is common.
- Moderate to heavy groundwater or long discharge run: 1/2 HP pump.
- Very high water table or long, high discharge run: 3/4 HP or more (get a pro’s opinion).
When in doubt, slightly oversize the pump (within reason). It will run less often and handle storms better.
Step 5: Plan the Pit Location and Discharge Route
Choosing the Pit Location
Ideal characteristics:
- Lowest part of the basement or crawlspace where water naturally collects.
- Accessible for maintenance (not jammed behind built-ins).
- Close to a dedicated GFCI outlet.
- Far enough from structural footings (don’t undercut a foundation).
- Away from main pathways where an open lid could be a hazard (use a solid lid if in traffic area).
Planning the Discharge Route
You must decide how water will leave the house and where it will go:
- Through a rim joist or foundation wall:
- Common method: drill a hole just above grade level.
- Use a sleeve, sealant, and make sure the outlet slopes away from the foundation.
- Into exterior piping:
- Sometimes tied into underground drainage piping that sends water to a swale, dry well, or storm system.
- Distance from house:
- Aim for discharge 10 feet or more from your foundation if possible.
- Use extensions or splash blocks to direct water away.
Never:
- Discharge into a septic system or sanitary sewer (often illegal and can cause backups).
Step 6: Installing a New Sump Pit in a Concrete Basement Floor
If you already have a pit, you can skip to Step 7.
6.1 Mark the Pit
- Place the sump pit upside down on the floor where you want it installed.
- Trace around the pit with a marker.
- Add a few extra inches all around to allow for gravel-typically a total opening 2-4 inches bigger than the pit.
6.2 Cut the Concrete
Options:
- Use a concrete saw with a masonry blade to cut along your outline.
- For small jobs, drill holes along the circle with a hammer drill and break it out with a sledge and chisel.
Tips:
- Work slowly to control dust.
- Have a shop-vac running nearby if possible.
- Wear eye and respiratory protection.
6.3 Remove Concrete and Soil
- Break the concrete within the cut area into manageable pieces and remove them.
- Dig out the soil to the required depth (usually pit height plus 2-3 inches of gravel).
- Remove any large rocks or debris.
Watch for:
- Existing drain lines, radon pipes, or other utilities. If you hit something unexpected, stop and identify it before continuing.
6.4 Prepare the Base and Set the Pit
- Add 2-3 inches of gravel to the bottom of the hole.
- Level the gravel so the pit sits flat.
- Lower the pit into place. It should sit slightly below slab level so you can patch around it.
- Ensure the pit is level in all directions.
Optional but recommended:
- Backfill around the pit with gravel to allow better water movement toward it.
- Leave a small gap between pit rim and concrete for a flexible seal.
6.5 Patch Around the Pit
- Mix concrete according to the manufacturer’s instructions.
- Trowel concrete around the pit rim to secure it and make a smooth transition from floor to pit.
- Allow to cure as directed before placing heavy loads nearby.
Step 7: Installing or Replacing the Sump Pump in the Pit
7.1 Remove the Old Pump (Replacement Scenario)
If you’re replacing an existing pump:
- Unplug the old pump from the outlet.
- Loosen the clamps on the existing check valve and remove the section of pipe with the pump attached.
- Lift the pump straight up and out of the pit (it may be heavy; use proper lifting technique).
- Clean the pit: remove sludge, debris, and sediment using a shop-vac, bucket, or scoop.
7.2 Prepare the New Pump
- Set the pump next to the pit on a clean surface.
- Verify the float or sensor has free range of motion and is not blocked by the pump body.
- Attach a short vertical length of PVC pipe (called a “riser”) to the pump’s discharge outlet:
- Use the appropriate adapter if needed (often included with the pump).
- Prime and glue the connection if it’s a slip fitting, or tighten if threaded (use thread sealant if required).
7.3 Position the Pump in the Pit
- Place a layer of flat bricks or pavers at the bottom of the pit if recommended by the manufacturer. This can keep the pump intake out of heavy sediment.
- Carefully lower the pump into the pit, keeping the riser pipe vertical.
- Make sure:
- The pump is stable and level.
- The float moves freely without touching the pit walls or lid.
Step 8: Install the Check Valve and Vertical Discharge Pipe
8.1 Measure and Cut the Vertical Pipe
- Measure from the pump outlet (or riser top) to just above the pit lid, allowing room for the check valve.
- Cut a piece of PVC pipe to this length.
- Dry fit the pipe to ensure height and alignment are correct.
8.2 Install the Check Valve
Most check valves have an arrow indicating the direction of water flow.
- Cut the vertical pipe where you want the check valve to sit (usually a foot or so above the pump).
- Install the check valve so that the arrow points up (toward where the water will exit the house).
- Tighten the hose clamps or glue, depending on the valve style.
- Make sure there’s room above the valve to access it later for service.
8.3 Continue the Discharge Pipe Upward
- From the top of the check valve, dry fit additional pipe sections to reach the point where the pipe will turn horizontally and head toward the exit point.
- Use 45° and 90° elbows as needed, keeping the route as straight as possible to reduce backpressure.
- Once you’re satisfied with the layout, mark joints, prime, and glue them.
Step 9: Penetrating the Wall and Running the Exterior Drain
9.1 Drill the Wall Exit
- Choose a spot just above the exterior grade line.
- Use an appropriately sized hole saw or masonry bit to drill a hole through the rim joist or foundation wall, sized for your PVC pipe plus sleeve if used.
- Slope the hole slightly downward to the outside so water drains away.
9.2 Run the Pipe Through the Wall
- Insert a short section of PVC pipe through the hole.
- Glue or connect it to the interior discharge line.
- Seal around the pipe on both sides with a quality sealant (polyurethane or silicone) to stop air and water infiltration.
9.3 Exterior Piping
- On the outside, extend the discharge line away from the house:
- Use elbows and pipe to direct water at least several feet from the foundation.
- Aim for 10 feet or more if possible.
- Terminate the pipe with:
- A downturned elbow to prevent splashing, and/or
- A splash block or extension that directs water further away.
- In cold climates, consider a freeze-proof discharge option or a section with a relief hole/port in case the outlet freezes.
Step 10: Electrical Connection and Optional Backup
10.1 Powering the Pump
- Plug the sump pump into a GFCI-protected outlet.
- Do not use extension cords long term. If the outlet is too far, have an electrician install one closer to the pit.
- Label the circuit at the panel so you know which breaker controls the pump.
10.2 Optional Battery Backup Pump
In areas with frequent power outages or heavy storms:
- Install a battery backup pump or secondary pump:
- Typically a smaller pump in the same pit with its own float and discharge (sometimes tied into the main discharge line).
- Powered by a deep-cycle battery and charger/monitor unit.
- Follow the manufacturer’s instructions carefully, or hire a pro for installation.
Step 11: Testing and Adjusting the Pump
This is one of the most important steps-never skip a thorough test.
11.1 Fill the Pit with Water
- Use a garden hose, bucket, or multiple buckets to fill the sump pit with clean water.
- Watch the water level rise toward the float.
11.2 Observe Pump Operation
- When the float reaches its “on” level, the pump should start.
- Observe the discharge line:
- You should see/hear water flowing outside.
- There should be no major leaks at joints or around the check valve.
- When the water level drops to the “off” level, the pump should stop.
11.3 Check the Check Valve Operation
After the pump shuts off:
- Listen for water dropping back into the pit. A small amount is normal.
- If a large volume returns, the check valve may be installed backward, defective, or not sealing properly.
11.4 Adjust the Float (If Applicable)
Some pumps have adjustable floats/rods:
- Make sure the pump turns on before the water level gets too high.
- Make sure it turns off before sucking air excessively (which can cause noise or wear).
- Ensure the float swings freely and doesn’t hit the pit side or cords.
Step 12: Securing Cords, Cover, and Final Clean-Up
- Secure cords and pipes:
- Use cable ties or clips to keep power cords and float wires away from moving parts.
- Strap the discharge pipe to nearby framing for stability.
- Install the pit lid:
- Many lids have cutouts for the discharge pipe and power cords.
- Make sure the lid closes tightly to reduce odors and improve safety.
- Clean up the work area:
- Remove debris, old pipe, and concrete pieces.
- Wipe up any standing water around the pit.
Step 13: Common Variations and Special Scenarios
Scenario A: Crawlspace Installation
- You may not have a concrete slab-just dirt.
- Still use a pre-formed pit or at least a lined hole to keep sides from collapsing.
- Ensure the pit is stable and deep enough for proper pump operation.
- Discharge line routing can be trickier; you may need longer runs or overhead piping.
Scenario B: High Water Table / Frequent Pumping
- Consider:
- A larger basin to handle more water.
- A more powerful pump or dual pump setup.
- Dedicated backup power.
Scenario C: Cold Climate and Freezing Risk
- Make sure the discharge line outside is sloped and drains out completely when the pump stops.
- Avoid long horizontal runs where water can sit and freeze.
- Consider a freeze-guard or vented fitting that lets water escape if the outlet freezes.
Scenario D: Existing French Drain or Perimeter Drain Connection
- Some systems tie the sump pit to a perimeter drain around the foundation.
- Be careful not to disturb these if they’re already in place.
- When cutting into an existing system, consider hiring a pro, as improper connections can cause more harm than good.
Step 14: Maintenance Tips to Keep the Sump Pump Working
An installed pump is only helpful if it works when you need it. Regular maintenance is simple and vital.
- Test the pump at least twice a year:
- Pour water into the pit and confirm proper operation.
- Clean the pit once or twice a year:
- Remove debris, silt, and foreign objects that can clog the pump intake.
- Inspect the check valve:
- Look for signs of leakage or unusual noises.
- Inspect the discharge outlet:
- Make sure it’s not blocked by leaves, ice, or debris.
- Backup system check:
- If you have a battery backup, check water level in the battery (if applicable) and test according to the manufacturer’s recommendations.
When to Call a Licensed Plumber or Electrician
Call a professional if:
- You’re not comfortable cutting concrete or penetrating foundation walls.
- You are unsure how to safely connect to existing drainage systems.
- You notice signs of structural issues when cutting the slab (cracks widening, significant movement).
- There is no safe or nearby electrical outlet, or your electrical panel is confusing.
- Your home’s local codes are complex or require permits and inspections.
Final Thoughts
Installing a sump pump is a very doable project for a careful, motivated homeowner. When you follow a clear, detailed process-planning the layout, preparing a proper pit, installing a reliable pump and discharge system, and thoroughly testing everything-you dramatically reduce the risk of basement flooding and water damage.
Take your time, prioritize safety, and don’t rush the testing phase. A few extra minutes now can save you thousands of dollars in repairs later.