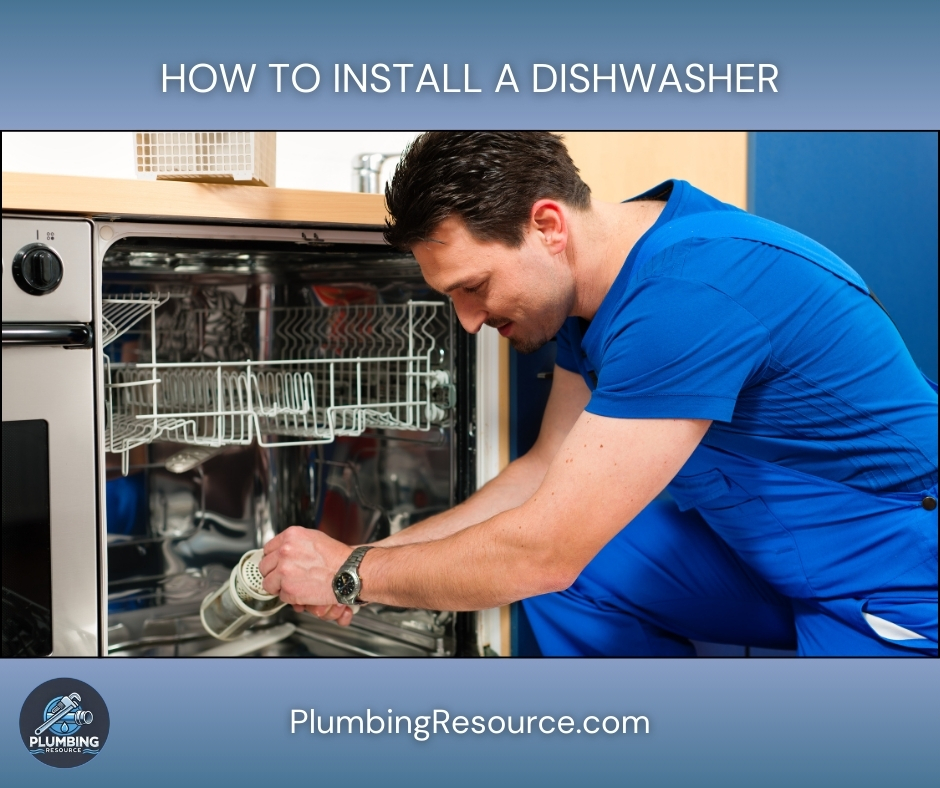
Dishwashers combine plumbing, electrical, and mechanical systems in one compact box. When something goes wrong, it can feel intimidating-but many dishwasher problems are completely fixable with basic tools and patience.
In this guide, I’ll walk you through repairing a dishwasher from a plumbing standpoint: fixing leaks, drain problems, and fill issues. I’ll explain every step in detail so even a first-time DIYer can follow along.
⚠️ Important Safety Note
If you are uncomfortable dealing with electricity or if there are signs of burnt wires, burning smell, or water inside electrical components, stop and call a professional. This guide focuses mainly on plumbing and basic mechanical issues.
1. Start With Safety and Basic Checks
Before you touch anything, make it safe and avoid damage to your home.
1.1 Turn Off Power
- Locate the power source:
- Many dishwashers are hard-wired to a junction box under the sink or behind the unit.
- Others are plugged into an outlet under the sink.
- Shut off the power:
- If it’s plugged in, unplug it.
- If it’s hard-wired, turn off the breaker that feeds the dishwasher at your electrical panel.
- Try to start the dishwasher from the control panel. If it doesn’t light up or respond, power is off.
🔧 Tip: Label the breaker once you identify it. This will save you time in future repairs.
1.2 Turn Off Water Supply (If Needed)
For many repairs, you may need the water off.
- Look under the kitchen sink for a small shut-off valve on the hot water line.
- Turn the valve clockwise until it stops.
- If there’s no individual shut-off:
- You may need to shut off the main water supply to the house (usually near the meter or main entry point).
2. Gather Tools and Materials
Having everything ready makes repairing a dishwasher smoother and less stressful.
Basic Tools:
- Adjustable wrench
- Phillips and flathead screwdrivers
- Channel-lock pliers
- Towels or rags
- Small bucket or shallow pan
- Flashlight or headlamp
Common Repair Materials:
- Replacement drain hose (if cracked or clogged)
- Hose clamps (worm-gear style)
- Teflon (PTFE) tape for threaded connections
- Replacement dishwasher inlet valve (if diagnosed as bad)
- New gasket for door (if leaking from the door)
- Zip ties (for securing high loops on drain hoses)
You may not need all of these, but it’s helpful to know what is commonly involved in repairing a dishwasher.
3. Understand How a Dishwasher’s Plumbing Works
You’ll diagnose problems much faster if you understand the basic flow.
3.1 The Water Supply
- Hot water supply line (usually 3/8″ or 1/2″) connects from under the sink shut-off valve to the dishwasher’s inlet valve.
- The inlet valve opens during the cycle to let water into the tub.
- If the valve is clogged or stuck, the dishwasher won’t fill correctly.
3.2 The Drain System
- The dishwasher pump pushes dirty water out through the drain hose.
- The drain hose usually goes:
- To an air gap on the sink deck, then to the garbage disposal or sink tailpiece, or
- In a high loop attached to the underside of the countertop, then to the disposal or sink drain.
3.3 Door and Tub Seal
- The rubber door gasket seals the tub when the door is closed.
- If it’s damaged, worn, or coated with debris, leaks can occur at the front of the unit.
4. Diagnose the Problem by Symptom
Let’s break down common symptoms:
- Dishwasher won’t drain.
- Dishwasher is leaking.
- Dishwasher won’t fill with water.
- Dishes come out dirty or with residue.
You may have more than one symptom. Start with the one that seems most urgent (for example, a leak).
5. Repairing a Dishwasher That Won’t Drain
This is one of the most common issues and usually plumbing-related.
5.1 Check the Sink and Garbage Disposal
- Run the faucet and see if the sink drains normally.
- If the sink is clogged or slow, the dishwasher won’t drain properly either.
- If you have a garbage disposal:
- Turn it on with running water for 20–30 seconds.
- Make sure it spins freely and drains well.
✅ If the sink or disposal is clogged, clear that first (plunger, snake, or professional help). The dishwasher drain may work once the main drain clears.
5.2 Check for Newly Installed or Replaced Garbage Disposal
If a new disposal was recently installed:
- Sometimes the installer forgets to knock out the dishwasher plug inside the disposal’s inlet.
- Remove the dishwasher drain hose from the disposal inlet.
- Shine a flashlight into the inlet:
- If you see a solid plastic disc blocking the opening, the plug was never removed.
- Use a flathead screwdriver and a hammer to gently tap the plug inside.
- Reach inside the disposal (power off and unplugged) and remove the loose plastic plug so it doesn’t jam the impeller.
- Reattach the dishwasher drain hose with a clamp.
5.3 Inspect the Drain Hose for Kinks, Sagging, or Clogs
- Locate the drain hose under the sink:
- It may go from dishwasher → air gap → disposal/sink.
- Or from dishwasher → high loop → disposal/sink.
- Check for:
- Kinks or sharp bends.
- Low sagging sections full of debris/water.
- Loose or corroded clamps.
- Fix kinks and sagging:
- Straighten any sharp bends.
- Use zip ties to strap the hose in a high loop under the countertop (this prevents backflow).
- Check for clogs:
- Disconnect the drain hose at the disposal or sink tailpiece.
- Place the hose end in a bucket.
- Lower the hose a bit; if water pours out sluggishly and looks dirty, there may be a clog further inside.
- You can gently run water through the hose from the sink sprayer or use a small, flexible brush to clear it.
⚠️ If the hose is brittle or cracked, replace it rather than trying to salvage it. A cracked hose will eventually leak.
5.4 Clean the Filter and Drain Area Inside the Dishwasher
Most modern dishwashers have a removable filter assembly at the bottom.
- Open the door and remove the bottom rack.
- Look for a round or rectangular filter at the bottom center of the tub.
- Rotate or release the filter according to the arrows or tabs.
- Rinse the filter under warm water and scrub off any food buildup with a soft brush.
- Check the drain sump (the opening under the filter) for:
- Food chunks, glass, bone fragments, twist ties, etc.
- Carefully remove any debris with gloves or pliers.
Reinstall the filter and make sure it is locked into place properly—an incorrectly seated filter can cause poor drain and damage.
5.5 Test the Drain Function
- Restore power and water (if you shut it off).
- Run a short cycle or a cancel/drain cycle.
- Watch the drain hose under the sink:
- You should see water flow into the disposal or sink tailpiece.
- Listen for the drain pump running strongly.
❌ If the drain pump hums but no water moves, the pump may be jammed or defective. That moves beyond basic DIY plumbing and may require an appliance technician.
6. Repairing a Dishwasher Leak
Leaks can come from the front of the door, underneath the dishwasher, or from connections under the sink.
6.1 Identify Where the Leak Appears
- Place dry paper towels or rags:
- Under the front edge,
- Under the sides, and
- Under the back if accessible.
- Run a short cycle and observe where water appears on the towels.
This tells you which area to inspect more closely.
6.2 Leaks at the Front of the Door
Likely causes:
- Damaged or dirty door gasket.
- Over-soaping (using regular dish soap instead of dishwasher detergent).
- Dishwasher not level.
6.2.1 Inspect and Clean the Door Gasket
- Open the door fully.
- Look at the rubber gasket around the inside edge of the tub.
- Check for:
- Cuts, tears, or missing sections.
- Hard, brittle, or flattened areas.
- Debris, mold, dried detergent.
- Clean the gasket:
- Use warm water and a mild detergent with a soft cloth.
- Gently wipe all around the gasket and the mating surface on the door.
- If the gasket is damaged:
- Order the exact replacement for your dishwasher model.
- Pull out the old gasket carefully from the groove.
- Gently press the new gasket in, starting at the top center and working your way down both sides.
- Make sure it’s seated evenly with no twists.
6.2.2 Check if the Dishwasher Is Level
- Place a level on the top of the dishwasher frame (door open).
- Check side-to-side and front-to-back.
- Adjust the front leveling legs:
- Use pliers or a wrench to turn the legs.
- Raising the front slightly helps prevent water from pooling and leaking at the front.
6.3 Leaks from Under the Dishwasher
These are often from:
- Loose water supply connections.
- A failing inlet valve.
- A cracked drain hose.
- The circulation pump or pump seal (more advanced repair).
6.3.1 Pull the Dishwasher Out for Inspection
- Turn off power at the breaker.
- Turn off the water supply valve under the sink.
- Remove the screws securing the dishwasher to the underside of the countertop (usually at the top inside edge of the opening).
- Carefully slide the dishwasher out a few inches:
- Watch the water line and drain hose; do not pull them tight.
- Use a flashlight to inspect the underside while running a short cycle:
- You may need a helper to turn the power back on after the unit is slightly pulled out.
⚠️ Keep a pan or towels under the unit to catch any drips during testing.
6.3.2 Inspect the Water Supply Connection
- Locate the water inlet at the front left or right bottom of the dishwasher.
- Look for:
- Compression fitting where the copper or braided line attaches.
- Signs of mineral buildup or rust.
- If it’s damp or dripping:
- Shut off water.
- Loosen the nut, remove the line.
- Wrap the threaded male connection with PTFE (Teflon) tape if it’s threaded.
- Reconnect and snug the nut-firm but not over-tightened.
- Turn water on and check again for leaks.
6.3.3 Inspect the Drain Hose Under the Unit
- Follow the drain hose from the pump to where it exits the dishwasher.
- Look for cracks, pinch points, or loose clamps.
- Replace the hose if it’s damaged:
- Loosen clamps at both ends inside the unit.
- Remove the old hose.
- Install the new hose and resecure clamps.
✅ Always route the drain hose in a smooth path without sharp bends.
6.3.4 Inlet Valve or Pump Leaks
If you see water dripping directly from:
- The inlet valve body, or
- The pump housing or center shaft,
those components usually need replacement, not repair. This requires:
- Disconnecting wiring connectors,
- Removing mounting screws, and
- Swapping in the exact replacement part.
If you’re not comfortable with these steps, this is a good point to call a professional.
7. Repairing a Dishwasher That Won’t Fill
If your dishwasher runs but stays dry, the issue is often at the water supply or inlet valve.
7.1 Confirm Water Supply Is On
- Check the shut-off valve under the sink:
- Turn counterclockwise fully open.
- If you recently worked on the plumbing, make sure no valves were accidentally left partially closed.
7.2 Check the Supply Line for Kinks or Damage
- Locate the flexible supply line from the shut-off to the dishwasher.
- Look for sharp bends, kinks, or crushed sections.
- If you find damage:
- Turn off water.
- Replace the line with a new braided stainless or appropriate rated line.
7.3 Check the Inlet Screen at the Valve
Many inlet valves have a small screen filter that can clog.
- Turn off water and power.
- Remove the lower access panel on the front of the dishwasher.
- Locate the inlet valve where the supply line attaches.
- Disconnect the supply line.
- Look into the valve opening:
- If you see a screen clogged with debris, carefully clean it with a small brush and water.
- Reattach the supply line and restore water and power.
- Run a short cycle and see if it fills.
❌ If you hear a humming noise but no water enters, and supply is good, the inlet valve itself may be faulty and may need replacement.
8. When Dishes Come Out Dirty or Gritty
Sometimes the dishwasher seems to run fine, but the results are poor.
8.1 Clean the Filter Thoroughly
As described earlier:
- Remove the bottom rack.
- Remove and clean the filter and drain area.
- Make sure the filter is fully locked back in.
8.2 Check Spray Arms for Clogs
- Remove the lower spray arm:
- Usually it pulls straight up or has a retaining nut.
- Rinse it under water and check each hole:
- Use a toothpick or small brush to clear clogs.
- Repeat with the upper spray arm if accessible.
- Reinstall spray arms securely.
8.3 Use the Right Detergent and Avoid Overloading
- Use dishwasher-specific detergent, not regular dish soap.
- Don’t stack dishes so tightly that spray arms can’t rotate or water can’t reach surfaces.
- Make sure nothing blocks the detergent dispenser from opening.
9. Reinstalling and Final Testing
Once you’ve completed your repairs:
- Push the dishwasher back into place slowly:
- Ensure the drain hose and supply line don’t kink or get pinched.
- Reattach the mounting screws to the countertop or cabinet.
- Restore water and power.
- Run:
- One short cycle to test fill and drain.
- Check under the sink and under the dishwasher for any leaks.
- Then run a full cycle with dishes to confirm everything works properly.
10. When to Call a Professional
Even with careful steps, some issues are better handled by an appliance technician or licensed plumber:
- Persistent leaks from pump or internal seals.
- Burnt smell, tripped breakers, or visible electrical damage.
- Control board issues: dead panel, strange error codes.
- Cracked tub or serious rust damage.
If you reach a repair that feels uncertain or unsafe, it’s not a failure-it’s smart. You’ve already done the initial inspection and can clearly explain what you see, which will help a professional fix the problem more efficiently.
By following this detailed guide to repairing a dishwasher, you’ve learned how to safely diagnose and address the most common plumbing-related issues: draining problems, leaks, and filling issues. With patience, basic tools, and a step-by-step approach, many dishwasher problems can be solved without replacing the entire unit.