Overview
Replacing a bathroom sink drain seems simple; however, small choices in sealants, gaskets, and alignment can make or break a watertight seal, so this guide walks you through every scenario with pro tips and clear, careful steps. Moreover, you’ll learn how to handle pop-up stoppers, grid drains, with-overflow vs without-overflow models, and tight pedestal or wall-hung spaces, so your drain replacement is clean, code-smart, and drip-free.
What You’re Replacing (Anatomy in Plain English)
- Drain Flange: The finished metal ring you see inside the sink bowl, which seals to the sink surface.
- Drain Body (Tailpiece): The tubular body below the sink that threads into the flange and connects to the P-trap.
- Gasket & Locknut: The rubber or fiber gasket and large nut that clamp the drain body to the sink underside.
- Pop-Up Assembly (if equipped): The stopper, pivot rod, clevis strap, and lift rod that open/close the drain.
- P-Trap Assembly: The curved trap and trap arm that connect the drain to the wall stub-out and provide the water seal.
Tools & Materials
Tools: Adjustable wrench, channel-lock pliers, basin wrench (optional), slip-joint pliers, putty knife/plastic scraper, utility knife, mini-hacksaw or tubing cutter (if shortening tailpiece), rag/towels, small bucket, flashlight, tape measure.
Materials: New drain (choose with or without overflow to match your sink), P-trap washers (1-¼″ lavatory standard), replacement slip nuts if brittle, plumber’s putty or 100% silicone (see below), isopropyl alcohol for cleanup, Teflon tape (for pivot rod threads if needed), leak detection dye.
Sealant choice:
- Plumber’s putty is classic and easy to reset, yet some stone/composite sinks forbid it; therefore, check your sink manufacturer’s instructions first.
- Silicone bonds strongly and resists staining on porous materials, yet it’s harder to disassemble later; therefore, use a thin bead and commit to the fit before tightening.
Pre-Check & Sizing
- Match the overflow: If your sink has the small overflow slot near the rim, then your drain must be a with-overflow model; otherwise, choose a without-overflow drain.
- Confirm size: Most bathroom lavatories use 1-¼″ drains and traps; however, adapters exist if your wall arm is 1-½″.
- Clear the space: Remove items from the vanity and place a bucket under the trap, because residual water will spill during disassembly.
- Water supply: You don’t have to shut the water off for a drain job; nevertheless, close the stop valves if you’ll be nudging supply lines while working in a pedestal or tight vanity.
Step-by-Step Replacement
1) Disconnect the Pop-Up (If Present)
- Raise the lift rod and loosen the clevis strap screw, then slide the strap off the pivot rod, because this frees the stopper link.
- Unscrew the pivot rod nut on the back of the drain body, and pull the pivot rod out, since the stopper will now lift out from above.
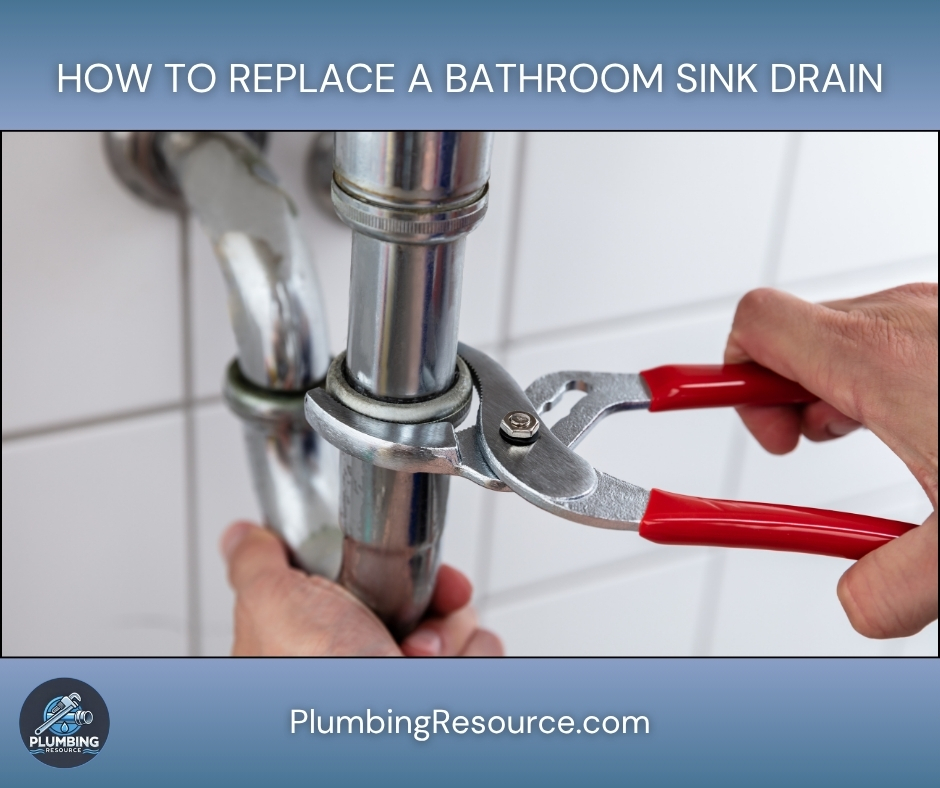
2) Remove the P-Trap
- Loosen the two slip nuts (one at the trap arm, one at the tailpiece) by hand first, and then use slip-joint pliers gently if stuck, so you avoid cracking old plastic.
- Lower the trap into the bucket, and inspect washers; furthermore, plan to replace worn, flattened, or hardened gaskets.
3) Extract the Old Drain
- From above, hold the drain flange to prevent spinning; meanwhile, from below, back off the large locknut and remove the friction washer and rubber gasket.
- Push the drain body down and lift the flange out from the top, then scrape away old putty or silicone carefully to avoid scratching the sink.
4) Clean & Dry the Surfaces
- Remove every trace of old sealant and wipe the sink hole with alcohol, because clean, dry, residue-free surfaces are essential for a lasting seal.
5) Dry-Fit the New Drain (No Sealant Yet)
- Insert the new drain body from below and set the flange on top (or vice versa per manufacturer), so you can confirm tailpiece length and overflow alignment.
- If the tailpiece is too long for your trap to seat properly, then mark and trim squarely with a tubing cutter or mini-hacksaw, and deburr the cut edge.
6) Choose & Apply the Sealant
- Plumber’s putty method: Roll a pencil-thick rope and circle the underside of the flange, then set the flange in the sink opening; additionally, remove any overlap.
- Silicone method: Run a thin, continuous bead under the flange, because a thick bead will squeeze into the drain path and look messy.
7) Assemble & Align
- Insert the drain body up through the sink, add the rubber gasket (rubber faces the sink), then the friction/backup washer, and thread the locknut on by hand.
- If your drain has an overflow window, rotate it to face the sink’s overflow port, since misalignment will cause slow draining or internal leaks.
- Hold the flange from spinning while tightening the locknut from below until snug; then give an extra quarter-turn with pliers, but avoid over-torque that can crack porcelain.
8) Rebuild the Pop-Up (If Equipped)
- Drop the stopper into the drain with its hole oriented to the back; next, insert the pivot rod through the drain’s port so the rod end seats in the stopper hole.
- Hand-tighten the pivot rod nut with its small conical washer; moreover, test that the stopper moves freely up and down.
- Slide the clevis strap onto the pivot rod and secure with the spring clip, then connect the lift rod and choose a hole on the strap that gives full open/close travel.
- Adjust the stopper height so “closed” seals tightly, yet “open” allows fast drainage; additionally, confirm the lift rod doesn’t bind against the faucet or backsplash.
9) Reinstall or Replace the P-Trap
- Slide new tapered washers onto the trap ends with the taper facing the fitting, then hand-thread the slip nuts.
- Align the trap so it’s plumb under the tailpiece and level to the wall arm; then snug each slip nut hand-tight plus a ¼ turn with pliers.
- If the trap won’t line up, use a short tailpiece extension or adjustable trap kit, because forcing misalignment invites leaks.
Special Scenarios (Read Before Testing)
- Grid or Push-Pop Drains (No Pop-Up Linkage): Installation is the same through Step 7; however, you’ll skip Step 8 entirely, and you’ll ensure the grid isn’t so fine it slows drainage.
- Without-Overflow Sinks (Vessel/Glass): Use a without-overflow drain; moreover, many vessel drains specify silicone above and below the sink for a cushion that protects glass or stone.
- Pedestal Sinks: Space is tight, so pre-assemble the drain and test the pop-up travel before you set the pedestal in place, because access is limited afterward.
- Wall-Hung Sinks: Support the sink or work with a helper, and confirm the P-trap doesn’t strain the wall arm, because leverage can crack the porcelain.
- Metal vs Plastic Drains: Metal looks premium and tightens crisply, while ABS/PVC are lighter and easier for beginners; nevertheless, avoid mixing metals that can corrode together.
- Stone/Composite Sinks: Many makers forbid putty, so prefer silicone and follow their torque guidance, since over-tightening can spider-crack the surface.
Leak-Free Testing (The Pro Way)
- Initial Wipe: Dry every joint and the underside of the sink with a clean towel, so new drips are obvious.
- Fill Test: Close the stopper, fill the bowl halfway, and check around the flange and overflow inlet for weeping; additionally, run your finger around the locknut and gasket below.
- Release Test: Open the stopper and watch all slip-joint connections while water rushes through; furthermore, look for slow forming beads that appear 1–3 minutes later.
- Dye Test: Add a few drops of food coloring to the bowl water during the fill test, because colored drips are easier to spot on white plumbing.
- Final Snug: If you see a weep at a slip joint, then tighten the nut ⅛–¼ turn only; if it persists, disassemble that joint, reseat the washer, and re-align the trap.
Common Problems & Fixes
- Leak at Flange Rim: Sealant too thin or surface not cleaned; therefore, remove flange, clean thoroughly, and re-set with fresh putty or silicone.
- Slow Drain After Replacement: Overflow not aligned or stopper too low; consequently, rotate the drain body to match the overflow port and raise the stopper linkage.
- Persistent Drip at Pivot Rod Nut: Conical washer worn or flipped backward; therefore, replace and orient the cone into the port, and hand-tighten the nut firmly.
- Trap Won’t Line Up: Tailpiece too short/long or wall arm out of plane; thus, add a tailpiece extension or use an adjustable trap kit to relieve stress.
- Plastic Slip Nuts Crack: Over-tightening is likely; hence, replace with new nuts/washers and tighten only to snug plus a small bump with pliers.
- Odor After Work: Trap dried while apart or micro-leak evaporated water; so refill the trap and check for seepage that may be evaporating before dripping.
Code-Savvy Notes (Helpful but Brief)
- Most jurisdictions accept hand-tight slip-joints plus slight tool snugging; nevertheless, avoid pipe dope on slip-joint threads because they’re not sealing surfaces.
- Maintain a water-seal in the P-trap and ensure continuous downward slope to the wall arm, since sags create odor-prone biofilm pockets.
- Do not glue slip-joint trap parts, because maintenance requires future disassembly.
When to Call a Pro
If you have cracked porcelain around the drain hole, a corroded brass tailpiece fused to the trap, or unusual 1-½″ lavatory drain hardware that won’t adapt cleanly, then a licensed plumber can preserve the sink and set a long-term, leak-free assembly quickly.
Quick Checklist (Print-Friendly)
- Match overflow type ✔️
- Gather tools, bucket, towels ✔️
- Disconnect pop-up and remove P-trap ✔️
- Remove old drain and clean surfaces ✔️
- Dry-fit for length and alignment ✔️
- Apply sealant and tighten locknut ✔️
- Rebuild pop-up and adjust travel ✔️
- Reinstall P-trap and align ✔️
- Fill/Release/Dye test and final snug ✔️