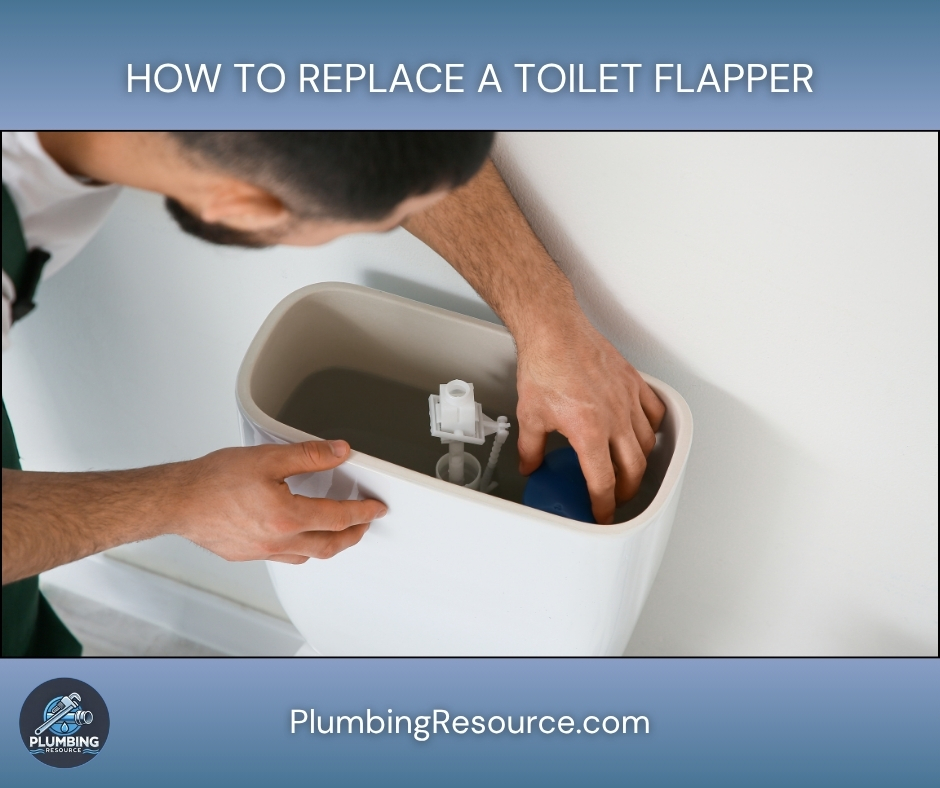
Introduction: Why the Toilet Flapper Matters
If your toilet keeps running, hisses occasionally, or refills on its own every few minutes, there is a very good chance the toilet flapper is the culprit. The flapper is the rubber or plastic seal at the bottom of the tank that lifts when you flush and closes when the tank is full.
When it wears out, warps, or doesn’t seal properly, water slowly leaks from the tank to the bowl. This constant leak makes your toilet run more often, wastes a lot of water, and increases your water bill.
In this guide, I’ll walk you through replacing a toilet flapper step by step, in deep detail, and we’ll cover alternate scenarios, such as:
- Different flapper styles (standard, adjustable, canister-style).
- Two-piece vs. one-piece toilets.
- What to do if the shutoff valve doesn’t work.
- How to adjust the chain and water level so you get a strong flush without wasting water.
By the end, you’ll know not just how to swap the flapper, but how to fine-tune the toilet so it works like it should.
Step 1: Confirm the Flapper Is Actually the Problem
Before you replace the flapper, make sure it really is the cause of the leak or running toilet.
1.1 Listen and Observe
- Remove the tank lid and set it carefully on a towel or soft surface so it doesn’t crack.
- Flush the toilet and watch how the flapper moves:
- It should lift fully during the flush.
- It should drop back down and seal the opening within a few seconds after the flush.
- Listen for sounds after the tank refills:
- A toilet in good shape stays quiet after filling.
- If you hear intermittent refilling, hissing, or water trickling, that strongly suggests a leaking flapper or a fill valve issue.
1.2 The Dye Test (Simple and Very Helpful)
- Wait until the tank is full and the toilet is not being used.
- Add 5–10 drops of leak detection dye to the tank (not the bowl).
- Wait at least 10–15 minutes without flushing.
- Check the bowl:
- If colored water appears in the bowl, water is leaking past the flapper.
- If the bowl water remains clear, the flapper might be fine and the problem could be the fill valve, overflow tube, or another leak.
Tip: If your flapper looks visibly warped, cracked, slimy, or hardened, it’s often worth replacing even if the dye test is borderline.
Step 2: Identify Your Toilet Flapper Type
Not all toilets use the same type of flapper. Choosing the right replacement is critical.
2.1 Common Types
- Standard Rubber Flapper (Most Common):
- Looks like a round rubber “hat” that covers the flush valve opening.
- Attaches to two side ears on the overflow tube with small arms or loops.
- Has a chain that connects to the flush handle lever.
- Adjustable Flapper:
- Similar to a standard flapper but has a dial or small openings you can adjust to control how long it stays open.
- Often used on 1.28–1.6 GPF (gallons per flush) water-saving toilets.
- Canister Flush Valve (e.g., some Kohler models):
- Instead of a traditional “flapper,” there’s a tall canister that lifts straight up.
- Uses a seal at the bottom, not a hinged flap.
- For these, you’ll often replace a canister seal or the entire canister assembly rather than a traditional flapper.
2.2 One-Piece vs. Two-Piece Toilets
- Two-piece toilets (separate tank and bowl) almost always have a standard-style flapper or canister system that’s easy to access.
- One-piece toilets can have more unique flush valve designs and may require brand-specific flappers or seals.
Important:
- Check for a brand and model number inside the tank (often stamped on the back wall of the tank or under the lid).
- Using a universal flapper works in many cases, but matching your toilet’s brand/model is ideal for high-efficiency or specialty toilets.
Step 3: Gather Tools and Materials
You don’t need much for this job, but being prepared makes it smoother.
3.1 Tools
- Adjustable wrench or small pliers (for stubborn shutoff valves).
- Small towel or sponge (for drying or catching drips).
- Bucket or bowl (optional, in case you need to drain extra water).
- Flashlight (for seeing inside the tank clearly).
3.2 Materials
- New toilet flapper (correct type and size, usually 2″ or 3″ flush valve opening).
- Optional: new chain if your old one is corroded or kinked.
- Optional: new overflow tube–mounting ring, if yours is damaged and the new flapper does not clip directly to the tube ears.
Step 4: Turn Off the Water and Drain the Tank Safely
4.1 Locate and Test the Shutoff Valve
- Find the shutoff valve on the wall or floor behind or next to the toilet.
- Turn the valve clockwise (right) to close it:
- If it resists, turn it gently but firmly.
- If it feels like it might snap or leak, stop forcing it; consider shutting water off at the main or proceeding carefully without fully closing it (we’ll cover that scenario).
If the shutoff valve is stuck:
- Try a small quarter-turn back and forth gently to loosen deposits, then continue closing.
- If it still won’t move and you’re uncomfortable, you may need a plumber to replace that valve before going further, especially if the toilet is your only one.
4.2 Flush and Drain
- Once water is off, flush the toilet and hold the handle down to drain as much water from the tank as possible.
- The tank will not refill because the supply is off.
- Use a sponge or towel to soak up the remaining water at the bottom of the tank if needed, especially if you want a cleaner, drier work area.
If you can’t turn off the water:
- You can still replace a flapper, but it’s trickier.
- Flush and then temporarily lift the float or turn the fill valve off at the top while you work (only if you’re confident and careful).
- Work quickly and keep a towel handy. In most cases, it’s better to address the shutoff valve first.
Step 5: Remove the Old Flapper
5.1 Disconnect the Chain
- Inside the tank, find the chain that connects the flapper to the toilet handle lever.
- Note which link it’s hooked on; you may want to match this length for the new flapper.
- Unhook the chain from the lever arm and let it rest inside the tank.
5.2 Detach the Flapper from the Overflow Tube
The overflow tube is the vertical tube in the middle of the tank.
- Side-Ear Style:
- Many flappers have two side arms that clip onto small pegs (ears) on the overflow tube.
- Gently push the flapper arm off each ear, one side at a time.
- Ring-Style Flapper:
- Some older or universal flappers have a ring that slides over the overflow tube instead of clipping onto ears.
- Lift the flapper and ring straight up and off the tube.
- Sometimes you’ll need to cut the old ring if it’s stiff and stuck (use caution and avoid damaging the tube).
- Remove the flapper entirely from the tank.
5.3 Inspect and Clean the Flush Valve Seat
- With the flapper removed, look at the flush valve seat, which is the circular opening at the bottom of the tank where the flapper used to rest.
- Use your fingers or a non-scratch pad to gently clean any:
- Mineral buildup.
- Slime or algae.
- Debris or grit.
- Do not use anything too abrasive that might scratch the seat, because scratches can cause future leaks.
Step 6: Install the New Flapper
6.1 Prepare the New Flapper
- Take the flapper out of its packaging.
- If it has an adjustable dial or flow restrictors, leave it on the factory setting for now; you can fine-tune later.
- If it came with a ring and side arms, decide which mounting style matches your system:
- If your overflow tube has ears, you’ll usually cut or remove the ring and use the side arms.
- If your overflow tube doesn’t have ears, you’ll slide the ring over the tube.
6.2 Attach the Flapper to the Overflow Tube
A. For Side-Ear Mounting:
- Position the flapper so its body covers the flush valve opening and the chain attachment points face the front of the tank (toward the handle).
- Hook one flapper arm onto one ear of the overflow tube.
- Gently stretch the other arm and hook it onto the opposite ear.
- Make sure the flapper pivots up and down freely and sits centered over the opening.
B. For Ring-Style Mounting:
- Slide the ring over the top of the overflow tube and lower it down until the flapper sits on the flush valve seat.
- Ensure the flapper can swing up freely and fall back down centered on the opening.
- Make sure the ring isn’t too high or too low; the flapper should sit flat and not be held open by tension.
6.3 Attach and Adjust the Chain
- Connect the chain to the lever arm (handle) using one of the chain’s links or the provided clip.
- Adjust the chain so there is a small amount of slack:
- Typically, you want about ½ inch (1–1.5 cm) of slack when the flapper is fully closed.
- Too tight: The flapper may not seal, causing a constant leak.
- Too loose: The handle won’t lift the flapper high enough, causing a weak or incomplete flush.
- Test the handle:
- Push the handle and watch the flapper lift.
- Release the handle and make sure the flapper drops back down and seals fully.
Step 7: Turn the Water Back On and Test the Flush
7.1 Restore Water Supply
- Turn the shutoff valve counterclockwise (left) to open it.
- Watch the tank as it fills:
- Check around the supply line and shutoff valve for any leaks.
- Make sure water rises to the correct fill line marked inside the tank or to about ½–1″ below the top of the overflow tube if no line is marked.
7.2 Test Flush Function
- Once the tank is full, flush the toilet.
- Observe:
- Does the flapper lift fully and stay open long enough for a strong flush?
- Does it drop back down smoothly and seal completely?
- Does the tank refill and then stop without continuing to run?
- If everything looks good, do 2–3 more test flushes to be sure.
Step 8: Fine-Tune the Chain and Flapper (If Needed)
Sometimes, small adjustments are needed to get the best performance.
8.1 Symptoms of Chain Problems
- Toilet keeps running or occasionally refills:
- Chain might be too tight or tangled, holding the flapper slightly open.
- Flush is weak or incomplete:
- Chain might be too loose, not lifting the flapper high enough.
8.2 Adjusting the Chain
- If chain is too tight:
- Move the clip one link closer to the flapper to create more slack.
- If chain is too loose:
- Move the clip one link closer to the handle to shorten it.
- Ensure the chain:
- Does not get caught under the flapper.
- Does not drape over or snag on the overflow tube.
Tip: After each adjustment, flush 2–3 times and watch the flapper and chain in motion.
8.3 Adjusting an Adjustable Flapper
If you have an adjustable flapper (often with a small dial or movable tabs):
- If the flush seems too short and doesn’t clear the bowl:
- Adjust the dial to stay open longer (usually by opening more holes or turning to a higher number).
- If the flush is too long and you want to save water:
- Adjust the dial so the flapper closes a bit sooner.
Always test after each adjustment so you balance flush strength and water conservation.
Step 9: Check for Leaks and Do a Final Dye Test
9.1 Visual Leak Check
- With the tank full and the toilet not in use, watch the water surface around the flapper area:
- It should be still, with no obvious movement.
- Look at the bowl:
- You should not see a small continuous trickle down the inside back of the bowl.
9.2 Dye Test Confirmation
- Add 5–10 drops of leak detection dye to the tank again.
- Wait another 10–15 minutes without flushing.
- Check the bowl:
- If no color appears, your new flapper is sealing properly.
- If color appears, recheck:
- Chain slack.
- Centering of the flapper.
- Cleanliness and smoothness of the flush valve seat.
If leaks persist after adjustments and cleaning, you may have:
- A damaged or warped flush valve seat.
- Cracks in the overflow tube or around the flush valve.
In those cases, you’ll likely need to replace the entire flush valve assembly, which is a more advanced but still DIY-possible repair.
Special Scenarios and Troubleshooting
10.1 One-Piece Toilets with Special Parts
Some one-piece toilets use proprietary flush valves and flappers. If:
- The flapper or seal looks unusual, or
- A universal flapper doesn’t seal well,
then:
- Look up the brand and model number inside the tank or under the lid.
- Purchase the exact OEM (original equipment manufacturer) flapper or seal kit recommended for your model.
These often install similarly but may have brand-specific steps.
10.2 Canister-Style Flush Valves
If your toilet uses a canister:
- Check the canister seal at the base.
- If cracked or hardened, replace just the seal if available.
- If the canister itself is worn or warped, replace the entire canister assembly following manufacturer instructions.
10.3 Replacing the Shutoff Valve Later
If you noticed your shutoff valve is:
- Very stiff,
- Leaking, or
- Corroded,
plan to have it replaced. This usually involves:
- Turning off the main water supply to the house.
- Removing the old valve and installing a new one (often a quarter-turn ball valve).
This is a more advanced task and sometimes best handled by a licensed plumber, but it’s worth addressing to make future repairs easier and safer.
Conclusion: A Small Part with a Big Impact
Replacing a toilet flapper is one of the most common and cost-effective plumbing repairs a homeowner can do. By taking the time to:
- Properly diagnose the problem,
- Choose the correct flapper type,
- Carefully adjust the chain and flapper, and
- Verify your work with a dye test,
you can stop that annoying running toilet, prevent water waste, and save money on your utility bill.
Use this guide whenever a toilet starts to “ghost flush,” hiss, or refill on its own, and you’ll know exactly what to do step by step.