Read This First (Safety, Tools, and Expectations)
Safety & House Rules
- Turn off nearby GFCI if you’ll use a wet/dry vac.
- Protect finishes: lay a towel in the tub to set tools on.
- Avoid chemical cocktails: never mix products (bleach + acid = toxic gas).
- Use gloves and eye protection; hair clogs can be… lively.
Skill Level: Beginner to Intermediate
Typical Time: 20–60 minutes (stubborn clogs can take longer)
Cost Range: $0–$40 (most homes already have what’s needed)
Tools & Materials (grab as many as apply)
- Phillips/flat screwdriver, adjustable wrench or channel-locks
- Flashlight, needle-nose pliers, old toothbrush/rag
- Plastic barbed hair tool (Zip-It) or hand auger (¼”–5⁄16″) 15–25 ft
- Cup or bell plunger (not a closet/flange plunger)
- Wet/dry vac with hose and optional crevice tip
- Baking soda + hot water (for light scum), enzyme drain cleaner (overnight)
- Painter’s tape or small rag to seal overflow when plunging
- Replacement stopper screws/O-ring (optional)
- Bucket, paper towels, disinfectant
Step 1: Identify Your Stopper Type (and Remove It Correctly)
Correct removal is half the battle. Because every step after this gets easier once the stopper is out.
Common Types:
- Lift-and-Turn / Push-Pull (Knob on top)
- How to remove: Open the stopper, hold the base, unscrew the knob counter-clockwise. If a hidden set screw exists, loosen it 1–2 turns with a small flat or 2 mm hex, then lift off. Unscrew the decorative cap/base counter-clockwise.
- Toe-Touch (Springy, press with your foot)
- How to remove: Open it, then rotate counter-clockwise to unthread the body from the drain shoe. Lift out.
- Trip-Lever with Internal Plunger (Lever on overflow plate)
- How to remove: Unscrew the two overflow-plate screws, gently pull the plate, linkage, and cylindrical plunger straight out. Keep linkage aligned to avoid bending.
- Screen/Strainer Only
- How to remove: Unscrew the two screws. If it’s press-fit, carefully pry up with a plastic putty knife.
Pro Tip: Photograph each step for reassembly orientation—especially linkage length on trip-lever assemblies.
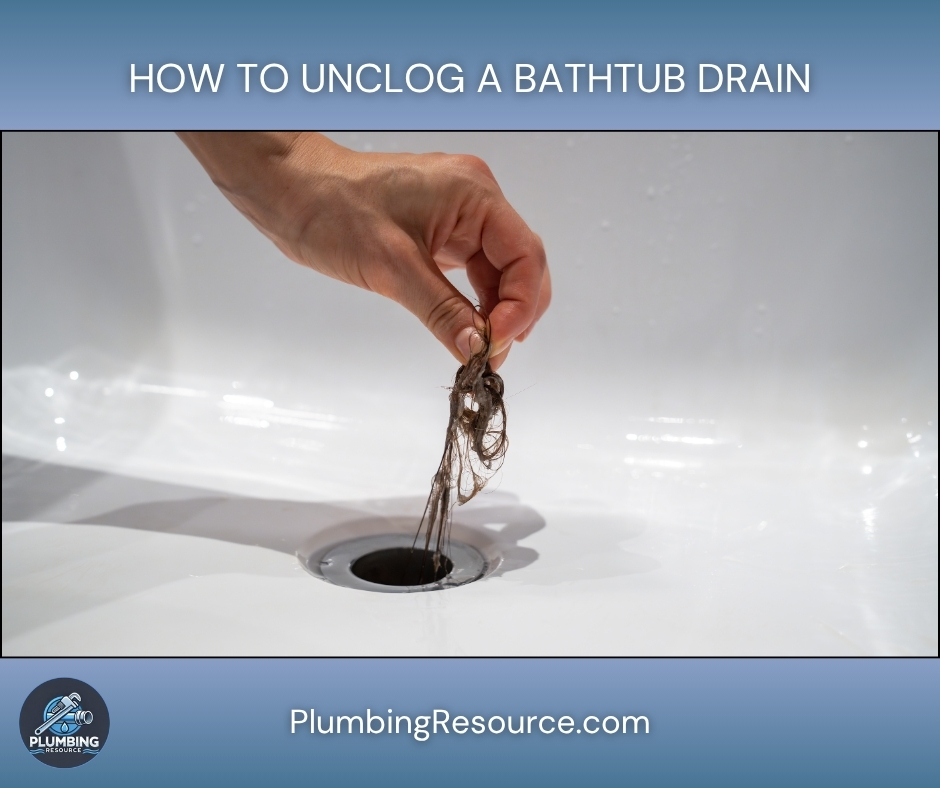
Step 2: Clear the “Topside” Clog (Hair + Soap Scum at the Drain)
Because most bathtub clogs live within the first 6–12 inches.
- Shine a flashlight into the drain.
- Use needle-nose pliers or a barbed hair tool to pull out hair bundles.
- Wipe the drain throat and cross-bars with a rag.
- Rinse with hot (not boiling) water for 30–60 seconds to soften soap residue.
If water still drains slowly, continue.
Step 3: Plunge—But Do It the Right Way (Seal the Overflow!)
Plunging a tub fails when air escapes through the overflow. Therefore, seal it.
- Seal the overflow opening behind the plate with painter’s tape or a rag you can hold firmly.
- Add 2–3 inches of warm water to the tub to cover the plunger cup.
- Place the plunger squarely over the drain, press to seal, and pump 10–15 strong strokes.
- Lift quickly to test flow. Repeat 2–3 rounds.
Works best for: Soft clogs close to the drain.
If it rebounds or improves only slightly, move on to snaking.
Step 4: Snake the Drain—Pick the Correct Path
Tubs often connect the drain to the overflow with a T-fitting, then into the trap. Therefore, choose the best access:
Option A — Through the Overflow (Best for Trip-Lever Systems)
- Remove the overflow plate (if not already off).
- Feed a ¼”–5⁄16″ hand auger gently downward.
- Crank while advancing, stop if you feel a bend (that’s the trap), and work past it slowly.
- When resistance eases, crank a little more, then retract slowly, wiping the cable.
- Flush the line with hot water.
Option B — Through the Drain Opening (Best for Lift-and-Turn / Toe-Touch)
- With stopper removed, guide the snake straight in.
- Keep tension on the cable; let the tool do the cutting—don’t force it.
- Break through, then retract, cleaning as you go.
- Flush with hot water.
If your tub has no accessible overflow and snaking from the drain fails:
Check for an access panel behind the tub (often in a closet). If accessible, you may remove the waste & overflow assembly for direct trap access. If not, consider the wet/dry vac method next.
Step 5: Wet/Dry Vac Method (Shock & Awe for Stubborn Hair Wads)
- Set vac to wet mode; remove dust filter.
- Seal the overflow tightly (tape + rag).
- Place the hose over the drain, wrap a rag around the connection to improve suction.
- Turn on and let it pull for 10–20 seconds.
- Turn off, then check the vac canister—empty the prize (yuck).
- Rinse drain with hot water.
Tip: If suction gurgles in nearby fixtures, stop—you’re pulling air. Improve seals and retry.
Step 6: Clean the Line (Optional but Recommended)
After mechanical clearing, residues remain. Therefore, clean the walls:
- Baking Soda + Hot Water (Light Residue)
- Pour ½ cup baking soda in the drain.
- Follow with 2–3 cups hot water after 10 minutes.
- Enzyme Cleaner (Overnight Maintenance)
- Follow label directions; enzymes digest hair/soap without harming pipes. Use overnight when the line is already flowing.
Avoid: Harsh acids or lye on old galvanized or thin-wall metal lines; they can overheat, pit, or leak, and they can damage finishes.
Step 7: Reassemble the Stopper (The Right Way)
- Lift-and-Turn/Push-Pull: Thread the base in hand-tight plus a nudge; reinstall the knob. If there’s a set screw, snug it—not gorilla tight.
- Toe-Touch: Thread the body in until the cap sits flat; test open/close.
- Trip-Lever: Reinsert plunger carefully; keep linkage straight. Align screw holes and tighten both screws evenly. Test lever up/down.
Check for Leaks: Run the tub for 2–3 minutes and inspect the ceiling below (if applicable) or the access panel for drips.
Troubleshooting: If It’s Still Slow or Backs Up Again
- Water backs up into tub when you run the sink or flush the toilet: The clog is downstream (main branch). Snake through a cleanout (often in the bathroom or stack) or call a pro.
- Standing water won’t budge, and plunging does nothing: The trap may be solidly packed or the cable is coiling. Switch to the overflow route, or use the wet/dry vac first.
- Trip-lever stopper never seals again: Linkage length changed; adjust the eyelet position or count of chain links.
- Old metal drain shoe wobbles or leaks: The rubber shoe gasket may be shot. That becomes a small replacement project—budget 60–90 minutes.
- Frequent re-clogs (every 1–3 months): Consider deeper snaking (20–25 ft), switch to enzyme maintenance monthly, and review hair-capture habits.
Pro-Level Techniques (When You Want It Perfect)
- Two-Person Plunge: One seals the overflow hard while the other plunges; the pressure spike doubles.
- Cable Choice: For tubs, a ¼” plain-end hand auger is nimble. If you hit repeated tight bends, step down to 3⁄16″ micro-auger.
- Finish Protection: Mask chrome trim and tub around the drain with painter’s tape before tools touch metal.
- Old Galvanized Lines: Expect black sludge (“biofilm + rust”). Gentle, persistent snaking beats chemicals here.
Prevent the Next Clog (10 Quick Wins)
- Install a hair catcher that you’ll actually empty.
- Brush hair before showering.
- Rinse the tub with hot water for 30 seconds after baths.
- Wipe visible hair from the drain every use.
- Use enzyme cleaner monthly overnight.
- Avoid oily bath products; if used, flush with hot water afterward.
- Keep stoppers cleaned and adjusted; sticky stoppers trap debris.
- Don’t use boiling water on PVC; use “hot tap” only.
- Replace brittle overflow gaskets to stop hidden leaks.
- If pipes are galvanized and over 50 years old, plan for repiping when remodeling.
When to Call a Pro
- Backups in multiple fixtures or drains gurgling in chorus
- Sewage odor or black water returning
- No cleanout access and repeated failures with DIY methods
- Suspicion of broken trap, collapsed line, or severe corrosion
Quick Reference: Decision Path
- Remove stopper & pull hair → 2) Plunge with overflow sealed → 3) Snake (overflow or drain) → 4) Wet/dry vac → 5) Rinse & enzyme clean → 6) Reassemble & leak-check → 7) Preventive habits
Materials Checklist (Copy/Paste for Your Hardware Run)
Plunger; plastic hair tool; ¼” hand auger (15–25 ft); screwdriver set; needle-nose pliers; towels; painter’s tape; wet/dry vac (optional); baking soda; enzyme cleaner; replacement stopper screws/O-ring (optional).