Learning how to install a new faucet can save you money and improve the appearance of your kitchen or bathroom. However, many homeowners struggle with leaks, loose fittings, or incorrect connections because they miss important installation steps. This guide explains the full process clearly, therefore helping you complete the project with confidence and avoid costly plumbing problems later.
Whether you are replacing an outdated fixture or upgrading your sink, these step-by-step instructions will help you install the faucet correctly.
🔍 Understanding the Project
A faucet controls the flow and temperature of water at your sink. Therefore, proper installation is important for preventing leaks, water damage, and poor performance.
Before you begin, you should confirm that the new faucet matches your sink configuration. For example, some sinks use a single-hole setup while others use three mounting holes. In addition, you must confirm that the faucet supply connections match the existing shutoff valves.
Many installation problems happen because homeowners rush the preparation stage. A faucet may wobble, leak, or have low pressure if parts are installed incorrectly. Therefore, planning ahead makes the installation much easier.
You should also expect tight working conditions under the sink. Because of this, having the correct tools is very important.
🧰 Tools & Materials
Before you begin, gather all required tools and materials.
🛠️ Tools
- Adjustable wrench
- Basin wrench
- Channel-lock pliers
- Screwdriver set
- Bucket
- Flashlight
- Putty knife
- Utility knife
- Towels or rags
🧱 Materials
- New faucet
- Supply lines
- Plumber’s putty or silicone
- PTFE thread tape
- Replacement drain assembly (if included)
- Cleaning supplies
🛠️ Setp-by-Step Guide: How To Install a New Faucet
1️⃣ Choose the Correct Faucet
Before removing the old faucet, confirm the new faucet matches your sink setup.
Check the Sink Hole Configuration
Most sinks use one of these layouts:
- Single-hole faucet
- 4-inch centerset faucet
- 8-inch widespread faucet
Next, measure the spacing between holes. A faucet that does not match your sink configuration will not install properly.
Verify Supply Line Connections
Most modern shutoff valves use 3/8-inch compression fittings. However, older homes may have different connections.
Check compatibility before starting the installation.
2️⃣ Turn Off the Water Supply
Before you install a new faucet, shut off the water valves under the sink.
How To Shut Off the Water
- Turn the hot and cold shutoff valves clockwise.
- Open the faucet afterward to release pressure.
- Place a bucket under the sink to catch water.
If the shutoff valves leak or fail to close fully, you may need to shut off the home’s main water supply.
3️⃣ Disconnect the Old Faucet
Next, disconnect the water supply lines from the shutoff valves.
Remove the Supply Lines
Use an adjustable wrench to loosen the nuts carefully. Then allow any remaining water to drain into the bucket.
Remove the Mounting Hardware
Look underneath the sink for mounting nuts or brackets.
A basin wrench usually makes this step much easier because the workspace is tight.
If the hardware is rusted:
- Apply penetrating oil
- Wait several minutes
- Try loosening again
In severe cases, you may need to cut the mounting nut.
4️⃣ Remove the Old Faucet
After disconnecting the hardware, lift the old faucet from the sink.
Sometimes old plumber’s putty or silicone holds the faucet in place. Therefore, gently break the seal with a putty knife.
Be careful not to scratch the sink surface.
5️⃣ Clean the Sink Surface
Before you install a new faucet, thoroughly clean the sink or countertop area.
Remove:
- Old putty
- Silicone
- Mineral buildup
- Dirt and grime
A clean surface helps the new faucet seal properly. In addition, it improves the finished appearance.
6️⃣ Prepare the New Faucet
Most faucets include rubber gaskets or foam seals.
Apply the Proper Seal
If the manufacturer includes a gasket, use it exactly as directed.
However, if no gasket is included, apply plumber’s putty or silicone under the faucet base.
Do not use excessive sealant because too much material can create an uneven seal.
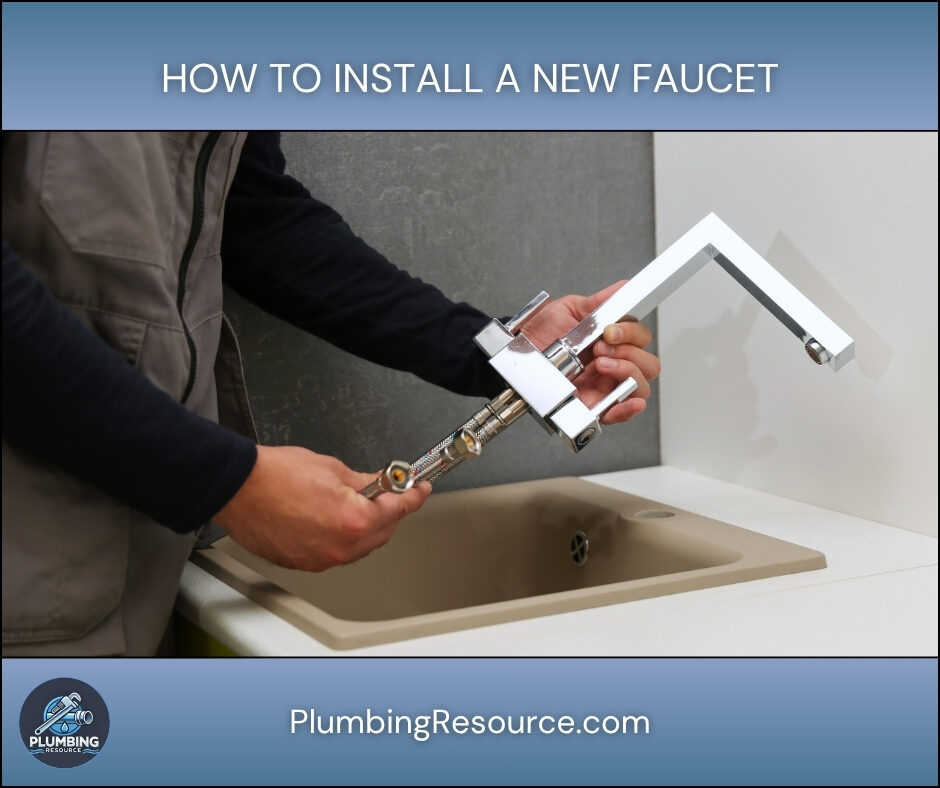
7️⃣ Install a New Faucet
Now you are ready to install the faucet.
Single-Hole Faucet Installation
- Feed the supply lines through the sink hole.
- Position the faucet correctly.
- Install washers and mounting nuts underneath.
- Tighten evenly.
Centerset Faucet Installation
- Align the faucet with the three sink holes.
- Install the mounting hardware.
- Tighten each side evenly.
Widespread Faucet Installation
Widespread faucets install in separate pieces.
First, install the handles. Next, install the spout. Then connect the water lines according to the manufacturer’s instructions.
Take your time during alignment because crooked faucets are difficult to correct later.
8️⃣ Connect the Water Supply Lines
Connect the hot and cold supply lines to the shutoff valves.
Important Tips
- Hot water connects to the left side
- Cold water connects to the right side
- Hand tighten first
- Then tighten gently with a wrench
Do not overtighten the fittings because compression seals can crack or deform.
9️⃣ Install the Drain Assembly
Many new bathroom faucets include a matching drain assembly.
Install the Drain
- Remove the old drain.
- Apply plumber’s putty beneath the drain flange.
- Insert the drain into the sink opening.
- Tighten the retaining nut underneath.
- Reconnect the P-trap.
Next, test the drain stopper for smooth operation.
🔟 Turn the Water Back On
After all connections are complete, slowly turn the shutoff valves back on.
Flush the Faucet
Before reinstalling the aerator:
- Run hot and cold water for 30 to 60 seconds.
- Flush debris from the lines.
- Reinstall the aerator afterward.
This step helps prevent debris from clogging the faucet cartridge.
1️⃣1️⃣ Check for Leaks
Carefully inspect every connection.
Check These Areas
- Supply line fittings
- Faucet base
- Drain assembly
- P-trap connections
- Sprayer hose connections
Use a dry paper towel to detect small leaks.
If a fitting drips slightly, tighten it carefully. However, avoid excessive force.
⚠️ Common Mistakes
- Overtightening fittings
- Cross-threading supply line nuts
- Forgetting to flush the lines
- Installing hot and cold lines backward
- Using too much plumber’s putty
- Reusing damaged supply lines
- Failing to clean the sink surface
💡 Pro Tips
- Always replace old supply lines during faucet installation.
- Use a basin wrench to save time in tight spaces.
- Keep towels under the sink throughout the project.
- Flush the lines before installing the aerator.
- Tighten fittings evenly for better sealing.
- Double-check faucet alignment before final tightening.
🔧 Troubleshooting
Faucet Wobbles
The mounting nuts may not be tight enough. Tighten the hardware evenly underneath the sink.
Low Water Pressure
Debris may clog the aerator. Remove and clean it thoroughly.
Water Leaks Under the Sink
Inspect the supply line fittings first. Then check the drain assembly connections.
Hot and Cold Water Are Reversed
Swap the supply line connections at the shutoff valves.
Faucet Will Not Sit Flat
Old putty or debris may still be on the sink surface. Remove the faucet and clean the area again.
👨🏻🔧 When to Call a Professional
You should contact a licensed plumber if:
- Shutoff valves leak
- Pipes are heavily corroded
- Water damage exists under the sink
- Drain pipes are damaged
- Plumbing modifications are required
- The sink or countertop cracks during installation
In addition, call a professional if you cannot stop an active leak.
❓ FAQ
How long does it take to install a new faucet?
Most faucet installations take between one and three hours. However, older plumbing may increase the time required.
Can beginners install a new faucet?
Yes. Many homeowners can install a new faucet successfully with basic tools and careful instructions.
Do I need plumber’s putty to install a new faucet?
Not always. Many modern faucets include rubber gaskets instead. Therefore, always follow the manufacturer’s instructions.
Why does my new faucet leak underneath?
Leaks usually happen because fittings are loose, cross-threaded, or improperly sealed.
Should I replace the supply lines too?
Yes. New supply lines improve reliability and reduce the chance of future leaks.
✅ Conclusion
Learning how to install a new faucet is a valuable DIY plumbing skill. When installed correctly, a new faucet improves appearance, function, and reliability.
Take your time during each step. In addition, always inspect every connection carefully before finishing the project.
A careful installation today can help prevent expensive plumbing problems later.
👋🏼 Before You Go…
If this guide helped you fix your sink, then save it for future reference. Also, share it with someone dealing with a clogged drain.
And if you want more expert plumbing tips, check out more guides on your site to stay ahead of costly problems.


