Installing a dishwasher can save time, improve kitchen efficiency, and increase convenience in your home. However, installing a dishwasher involves plumbing, electrical, and drain connections, so every step matters. This guide explains how to install a dishwasher from start to finish while helping you avoid leaks, drainage problems, and electrical issues.
Whether you are replacing an old unit or installing a dishwasher for the first time, this walkthrough will help you complete the project with confidence.
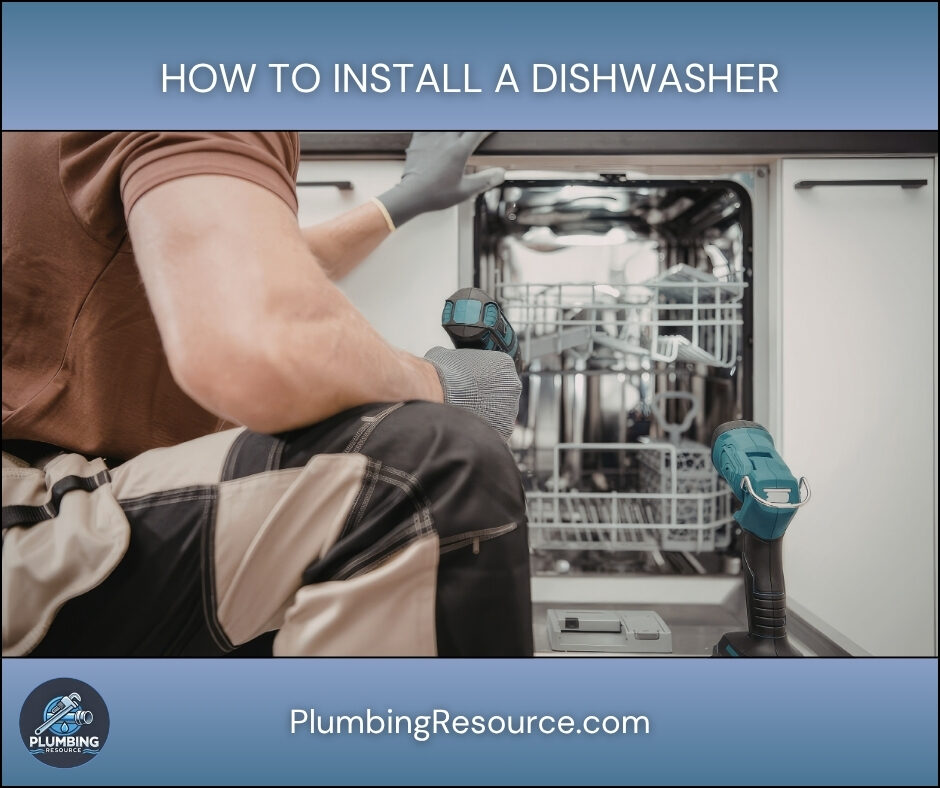
🔍 Understanding the Project
A dishwasher cleans dishes automatically by spraying heated water through internal spray arms during wash cycles. Because the appliance uses water, electricity, and drainage simultaneously, proper installation is critical.
If the installation is incorrect, several problems can occur. For example, water leaks may damage cabinets and flooring. In addition, poor drain connections can cause dirty water backups into the dishwasher. Electrical mistakes may also create serious safety hazards.
Before you begin, you should verify several compatibility factors:
- Cabinet opening dimensions
- Hot water supply availability
- Drain access location
- Electrical requirements
- Countertop mounting options
Most standard dishwashers fit a 24-inch-wide opening. However, compact units may require different dimensions.
Many homeowners also face common installation challenges. For example, tight cabinet spaces can make connections difficult. In addition, old shutoff valves, damaged drain hoses, or outdated electrical wiring may complicate the project.
Therefore, careful preparation helps the installation go much smoother.
🧰 Tools & Materials
- Adjustable wrench
- Channel-lock pliers
- Phillips screwdriver
- Flathead screwdriver
- Drill and bits
- Tape measure
- Utility knife
- Level
- Bucket
- Towels
- Flashlight
- Dishwasher installation kit
- Dishwasher drain hose
- Water supply line
- Hose clamps
- Wire nuts
- Teflon tape
- Mounting screws
- Power cord kit (if applicable)
- Voltage tester
🛠️ Step-By-Step Guide: How To Install a Dishwasher
1️⃣ Turn Off the Power and Water
First, turn off the dishwasher circuit breaker at the electrical panel. Then, verify the power is off using a voltage tester.
Next, shut off the hot water supply valve under the kitchen sink. After that, place towels and a bucket nearby because some water may spill during disconnection.
This step is critical because dishwashers combine water and electricity in one appliance.
2️⃣ Remove the Old Dishwasher
If you are replacing an existing dishwasher, begin by removing the lower access panel.
Then disconnect:
- The power connection
- The water supply line
- The drain hose
Afterward, remove the mounting screws that secure the dishwasher to the countertop or cabinets.
Carefully slide the unit out while feeding the hoses and wiring through the cabinet opening.
If the dishwasher feels stuck, check for hidden screws or flooring interference before forcing it out.
3️⃣ Inspect the Cabinet Opening
Before installing the new unit, inspect the dishwasher opening carefully.
Check:
- Width
- Height
- Depth
- Floor condition
- Pipe routing
- Electrical access
The floor should be level and free from damage. In addition, the opening must provide enough clearance for the dishwasher legs and insulation.
If the floor height changed after installing tile or flooring, you may need to adjust the dishwasher legs significantly.
4️⃣ Prepare the Electrical Connection
Dishwashers may use either:
- A plug-in power cord
- A hardwired electrical connection
If your dishwasher uses a power cord, attach the cord kit according to the manufacturer’s instructions.
If the unit is hardwired, remove the electrical junction box cover and prepare the wiring connections.
Typically:
- Black wire = hot
- White wire = neutral
- Green or bare wire = ground
Always follow local electrical codes. In many areas, GFCI protection is now required for dishwasher circuits.
5️⃣ Install the Dishwasher Water Supply Fitting
Most dishwashers require a 90-degree brass elbow fitting at the water inlet.
Wrap the threads with Teflon tape first. Then tighten the elbow carefully using a wrench.
Do not overtighten the fitting because excessive force may crack plastic components.
Next, connect the dishwasher supply line to the elbow fitting.
A braided stainless steel supply line is recommended because it is durable and flexible.
6️⃣ Connect the Drain Hose
The dishwasher drain hose prevents dirty water from remaining inside the appliance.
First, attach the hose securely to the dishwasher drain outlet.
Then route the hose toward the sink cabinet opening.
Most installations require either:
- A high loop
- An air gap
A high loop prevents contaminated sink water from flowing backward into the dishwasher. Therefore, secure the hose high under the countertop before connecting it to the drain system.
If local code requires an air gap, install it according to local plumbing requirements.
7️⃣ Slide the Dishwasher Into Place
Carefully feed the water line, drain hose, and electrical wiring through the cabinet opening.
Then slowly slide the dishwasher into position.
While sliding the unit inward:
- Watch for pinched hoses
- Prevent wire damage
- Avoid kinking the supply line
Stop periodically to check alignment.
Once positioned, the front of the dishwasher should sit flush with surrounding cabinet faces.
8️⃣ Level the Dishwasher
Proper leveling is extremely important during installing a dishwasher.
Place a level across the front and top of the unit.
Then adjust the leveling legs until:
- The dishwasher sits evenly
- The door opens smoothly
- The racks slide correctly
If the dishwasher is not level, water may pool improperly inside the tub. In addition, the door may not seal correctly.
9️⃣ Secure the Dishwasher
Most dishwashers secure to either:
- The underside of the countertop
- The cabinet sides
Install the mounting brackets according to the manufacturer’s instructions.
If you have stone countertops, side mounting brackets are often preferred because drilling into stone can cause damage.
Tighten the mounting screws firmly. However, avoid overtightening because it may damage the brackets.
🔟 Connect the Water Supply Line
Next, connect the supply line to the shutoff valve under the sink.
Tighten the compression fitting carefully using two wrenches:
- One wrench stabilizes the valve
- The other tightens the nut
This method helps prevent twisting or damaging the valve.
Afterward, slowly turn the water back on and inspect for leaks immediately.
1️⃣1️⃣ Connect the Drain Hose to the Sink Drain
Connect the drain hose to:
- The garbage disposal inlet
- Or the dishwasher branch tailpiece
If using a garbage disposal, verify the dishwasher knockout plug was removed first.
Many new disposal installations fail because homeowners forget this step.
Secure the hose connection tightly using a hose clamp.
Then inspect the routing again to ensure the hose maintains a proper high loop.
1️⃣2️⃣ Restore Power and Test the Dishwasher
Turn the electrical breaker back on.
Then run a short dishwasher cycle while monitoring:
- Water connections
- Drain connections
- Electrical operation
- Drain performance
Check carefully for:
- Water drips
- Drain leaks
- Unusual sounds
- Slow draining
Allow the dishwasher to complete both fill and drain cycles.
If everything operates normally, reinstall the lower access panel.
⚠️ Common Mistakes
- Forgetting to turn off power before installation
- Failing to remove the disposal knockout plug
- Kinking the water supply line
- Skipping the drain hose high loop
- Overtightening fittings
- Installing the dishwasher out of level
- Pinching hoses behind the appliance
- Using old or damaged supply lines
💡 Pro Tips
- Run hot water at the sink before starting the dishwasher for better cleaning performance.
- Use braided stainless steel supply lines for durability.
- Take pictures of old connections before disconnecting anything.
- Leave enough slack in hoses for future servicing.
- Test for leaks with a flashlight during the first cycle.
- Use side mounting brackets for stone countertops.
🔧 Troubleshooting
Dishwasher Will Not Drain
Check for:
- A clogged drain hose
- A blocked disposal inlet
- An improperly installed high loop
Dishwasher Leaks Underneath
Inspect:
- Supply line fittings
- Drain hose clamps
- Door gasket alignment
Dishwasher Does Not Power On
Verify:
- Circuit breaker position
- Wire connections
- Outlet power
- Junction box connections
Dishwasher Rocks or Moves
Adjust the leveling legs again and tighten mounting brackets securely.
👨🏻🔧 When to Call a Professional
You should contact a professional if:
- New electrical circuits are needed
- Plumbing modifications are required
- The shutoff valve leaks
- Cabinets need structural modifications
- You smell burning wires
- Drain backups continue after installation
In addition, local code requirements may require licensed electrical or plumbing work.
❓ FAQ
How long does installing a dishwasher take?
Most dishwasher replacements take between 2 and 4 hours. However, first-time installations may take longer.
Can you install a dishwasher without a garbage disposal?
Yes. You can connect the drain hose to a dishwasher branch tailpiece instead.
Do you need an air gap when installing a dishwasher?
Some local plumbing codes require an air gap. However, other areas allow a high loop instead.
What size water line is used for installing a dishwasher?
Most dishwashers use a 3/8-inch supply connection.
Why is my dishwasher not draining after installation?
Usually, the garbage disposal knockout plug was not removed or the drain hose is kinked.
✅ Conclusion
Learning how to install a dishwasher can help you upgrade your kitchen while saving money on installation costs. By following each step carefully, you can connect the plumbing, electrical, and drain systems successfully.
In addition, careful testing helps prevent future leaks and drainage issues. Take your time during the installation, and always prioritize safety throughout the project.
👋🏼 Before You Go…
If this guide helped you, save it for later and share it with someone planning a kitchen upgrade. A properly installed dishwasher can prevent major problems and improve daily convenience for years.


