Knowing how to repair a dishwasher can save you money, prevent water damage, and help your kitchen run smoothly again. Many dishwasher problems come from clogged drains, leaking connections, worn seals, or water supply issues. Fortunately, many of these repairs are manageable with basic tools and careful troubleshooting.
In this guide, you will learn how to diagnose common dishwasher issues, inspect plumbing connections, and complete repairs step by step. In addition, you will learn warning signs to watch for before a small problem becomes a major repair.
🔍 Understanding the Project
Dishwashers rely on several systems working together. These systems include water supply lines, drain hoses, pumps, filters, spray arms, and door seals. Therefore, a problem in one area can affect the entire appliance.
Common dishwasher problems include:
- Water leaking onto the floor
- Dirty dishes after a cycle
- Standing water inside the tub
- Loud grinding or humming noises
- Dishwasher not filling with water
- Dishwasher not draining completely
These issues often happen because of clogged filters, damaged hoses, loose fittings, worn gaskets, or failed valves. However, some problems develop slowly and become worse over time.
Warning signs usually appear before complete failure. For example, you may notice:
- Slow draining
- Water spots on the floor
- Musty smells
- Weak spray pressure
- Longer wash cycles
If you ignore these symptoms, you could eventually face cabinet damage, mold growth, or expensive appliance replacement. Therefore, repairing problems early is extremely important.
🧰 Tools & Materials
- Adjustable wrench
- Phillips screwdriver
- Flathead screwdriver
- Channel-lock pliers
- Flashlight
- Towels or rags
- Small bucket
- Replacement hose clamps
- Replacement drain hose
- Replacement door gasket
- PTFE thread tape
- Soft cleaning brush
- Toothpick or small wire
- Work gloves
- Dish soap
- Cleaning vinegar
🛠️ Step-By-Step Guide: How To Repair a Dishwasher
1️⃣ Disconnect the Power
First, turn off electrical power to the dishwasher.
Locate the dishwasher breaker in the electrical panel and switch it off. Then, verify the dishwasher no longer powers on. Some dishwashers plug into an outlet under the sink, while others are hardwired directly.
This step is critical because water and electricity create a dangerous combination.
2️⃣ Shut Off the Water Supply
Next, locate the hot water shut-off valve under the kitchen sink.
Turn the valve clockwise until it stops. After that, place a towel beneath the valve and supply line because small amounts of water may drip during repairs.
If the valve does not fully close, you may need to shut off the main water supply temporarily.
3️⃣ Inspect for Visible Leaks
Now, carefully inspect the area around the dishwasher.
Look for:
- Water stains
- Swollen cabinets
- Damp flooring
- Rust marks
- Mineral buildup
Leaks often appear:
- Under the door
- Beneath the dishwasher
- At the supply connection
- Around the drain hose
In many cases, visible water trails help identify the source quickly.
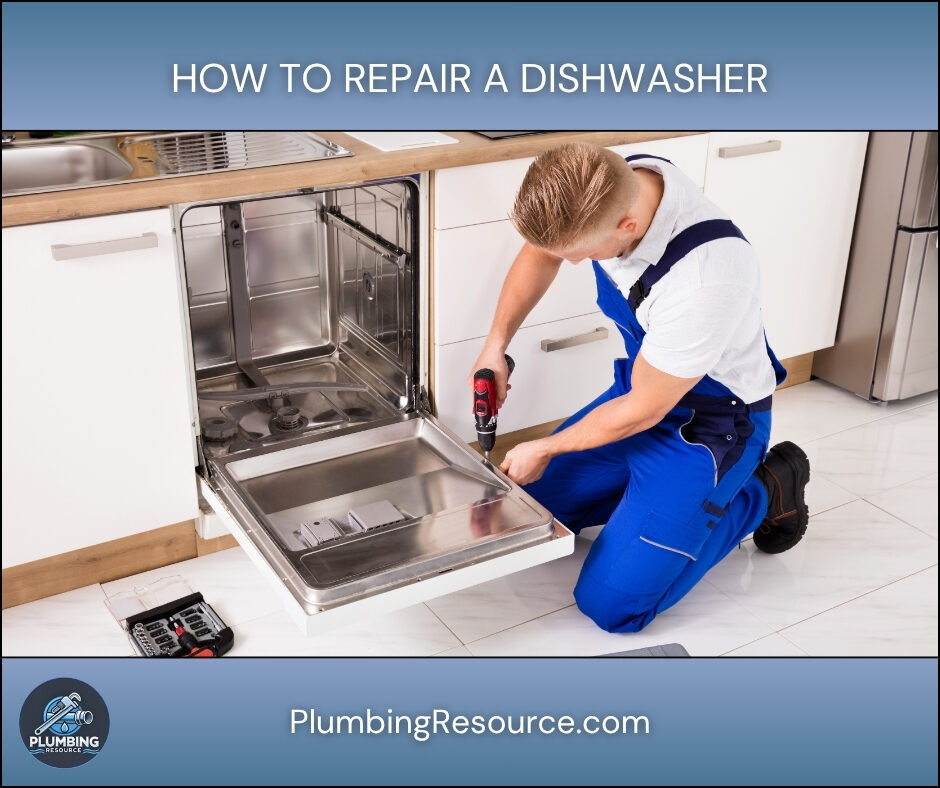
4️⃣ Remove the Lower Access Panel
Use a screwdriver to remove the lower front kick plate.
Behind this panel, you will usually see:
- Water supply connections
- Drain hose connections
- Pump assembly
- Inlet valve
Use a flashlight during inspection. In addition, keep towels nearby because trapped water may spill out.
5️⃣ Check the Dishwasher Drain Hose
A clogged or damaged drain hose is one of the most common dishwasher problems.
Inspect the hose for:
- Kinks
- Cracks
- Grease buildup
- Loose clamps
If the hose appears clogged:
- Disconnect it carefully.
- Flush it with warm water.
- Remove debris using a flexible brush.
If the hose is brittle or cracked, replace it immediately.
6️⃣ Clean the Dishwasher Filter
Most modern dishwashers contain removable filters near the bottom spray arm.
Remove the lower rack first. Then, unlock and lift out the filter assembly.
Wash the filter thoroughly using:
- Warm water
- Dish soap
- A soft brush
Food particles, grease, and debris often restrict drainage and reduce cleaning performance. Therefore, regular filter cleaning is extremely important.
7️⃣ Inspect the Garbage Disposal Connection
If your dishwasher drains through a garbage disposal, inspect the connection carefully.
Sometimes installers forget to remove the dishwasher knockout plug inside a new disposal.
Signs include:
- Dishwasher not draining
- Water backing up
- Loud draining sounds
Disconnect the hose and inspect the disposal inlet using a flashlight. If the knockout plug remains, remove it carefully.
8️⃣ Examine the Door Gasket
The rubber door gasket creates a watertight seal during operation.
Inspect it for:
- Cracks
- Tears
- Flattened sections
- Mold buildup
Clean the gasket thoroughly using warm water and mild soap. However, replace it if damage is visible.
To replace the gasket:
- Pull the old gasket out gently.
- Press the new gasket evenly into the channel.
- Start at the top center and work downward.
9️⃣ Check the Spray Arms
Clogged spray arms reduce cleaning performance significantly.
Remove the spray arms and inspect the holes carefully. Food debris and hard water buildup often block water flow.
Use:
- A toothpick
- Small wire
- Warm vinegar soak
After cleaning, reinstall the spray arms securely.
1️⃣0️⃣ Inspect the Water Inlet Valve
The inlet valve controls water entering the dishwasher.
If the dishwasher does not fill:
- The valve may be clogged
- The screen may contain debris
- The valve may have failed internally
Disconnect power and water first. Then, remove the supply line from the valve carefully.
Inspect the inlet screen for buildup. Clean it gently without damaging the screen mesh.
1️⃣1️⃣ Tighten Loose Connections
Loose plumbing fittings often create slow leaks.
Inspect:
- Compression fittings
- Hose clamps
- Threaded fittings
Tighten connections carefully using wrenches or pliers. However, avoid overtightening because fittings can crack.
If threaded fittings leak, apply PTFE tape before reconnecting.
1️⃣2️⃣ Test the Dishwasher
Restore power and water after completing repairs.
Run a short cycle and monitor:
- Drain performance
- Fill operation
- Spray arm movement
- Leaks
Watch underneath the dishwasher carefully during operation. In addition, inspect under the sink for dripping connections.
If no leaks appear and draining improves, the repair was successful.
⚠️ Common Mistakes
- Forgetting to disconnect power before repairs
- Overtightening plumbing fittings
- Ignoring small leaks
- Using regular dish soap instead of dishwasher detergent
- Reinstalling filters incorrectly
- Pinching the drain hose during reinstallation
- Forgetting to check the garbage disposal knockout plug
💡 Pro Tips
- Clean the dishwasher filter monthly.
- Run hot water at the sink before starting a cycle.
- Use vinegar occasionally to reduce hard water buildup.
- Inspect hoses yearly for wear or cracking.
- Keep the drain hose in a high loop position to prevent backflow.
- Replace damaged hose clamps immediately.
🔧 Troubleshooting
Dishwasher Still Won’t Drain
Check:
- Garbage disposal blockage
- Air gap blockage
- Drain pump obstruction
- Drain hose routing
Dishwasher Leaks From the Door
Inspect:
- Door gasket condition
- Dishwasher leveling
- Spray arm cracks
- Excess detergent use
Dishwasher Won’t Fill With Water
Verify:
- Water supply valve is open
- Inlet valve screen is clean
- Supply line is not kinked
- Float switch moves freely
Dishwasher Smells Bad
Clean:
- Filter assembly
- Spray arms
- Drain hose
- Interior tub with vinegar cycle
👨🏻🔧 When to Call a Professional
Some repairs require advanced appliance or plumbing knowledge.
Call a professional if:
- The pump motor fails
- Wiring appears burned
- Water leaks from internal seals
- The control board malfunctions
- The dishwasher trips breakers repeatedly
- You smell burning plastic or electrical odors
In addition, seek professional help if the dishwasher must be completely removed for major repairs.
❓ FAQ
How To Repair a Dishwasher That Won’t Drain?
First, inspect the filter and drain hose for blockages. Then, check the garbage disposal connection and clean the drain system thoroughly.
How To Repair a Dishwasher Leak?
Start by locating the leak source. Common causes include damaged gaskets, loose fittings, cracked hoses, or clogged spray arms.
Why Is My Dishwasher Not Cleaning Dishes?
Dirty filters, blocked spray arms, hard water buildup, or poor water pressure commonly reduce cleaning performance.
Can I Repair a Dishwasher Myself?
Yes, many common repairs are DIY-friendly. However, electrical or major mechanical repairs may require professional service.
How Often Should Dishwasher Filters Be Cleaned?
Most filters should be cleaned at least once per month. However, heavy use may require more frequent cleaning.
✅ Conclusion
Learning how to repair a dishwasher helps you solve common appliance problems before they become expensive repairs. By inspecting hoses, cleaning filters, checking seals, and testing drainage, you can restore proper dishwasher performance and prevent future issues.
In many cases, simple maintenance and early troubleshooting can extend the life of your dishwasher significantly.
👋🏼 Before You Go…
If this guide helped you, save this page for future reference. Also, share it with someone dealing with dishwasher problems so they can avoid unnecessary repair costs.


