Installing a garbage disposal is a great way to improve kitchen cleanup and reduce food waste. However, many homeowners feel overwhelmed by the plumbing and electrical connections involved. This guide explains how to install a garbage disposal step-by-step so you can complete the project safely and correctly.
If you follow the proper installation process, you can avoid leaks, drainage issues, electrical problems, and premature disposal failure. Additionally, a properly installed disposal can help protect your kitchen plumbing system from food buildup and clogs.
🔍 Understanding the Project
A garbage disposal grinds food waste into small particles so it can safely flow through the drain system. Therefore, proper installation is important for both performance and plumbing protection.
Before starting, you should confirm your sink setup is compatible with a disposal. For example, some older sinks may require drain modifications or additional support because disposals add weight underneath the sink.
You should also determine whether the disposal will connect to a dishwasher. Many kitchen sinks use the disposal as the dishwasher drain connection point. Additionally, some local plumbing codes require an air gap instead of a simple high loop drain hose setup.
Electrical planning is equally important. Some disposals plug into a GFCI outlet, while others require hardwiring. Therefore, you should verify your power setup before beginning installation.
Common installation challenges include:
- Tight cabinet spaces
- Misaligned drain piping
- Incorrect mounting assembly installation
- Dishwasher drain connection mistakes
- Electrical wiring confusion
Understanding these issues beforehand helps the installation go much smoother.
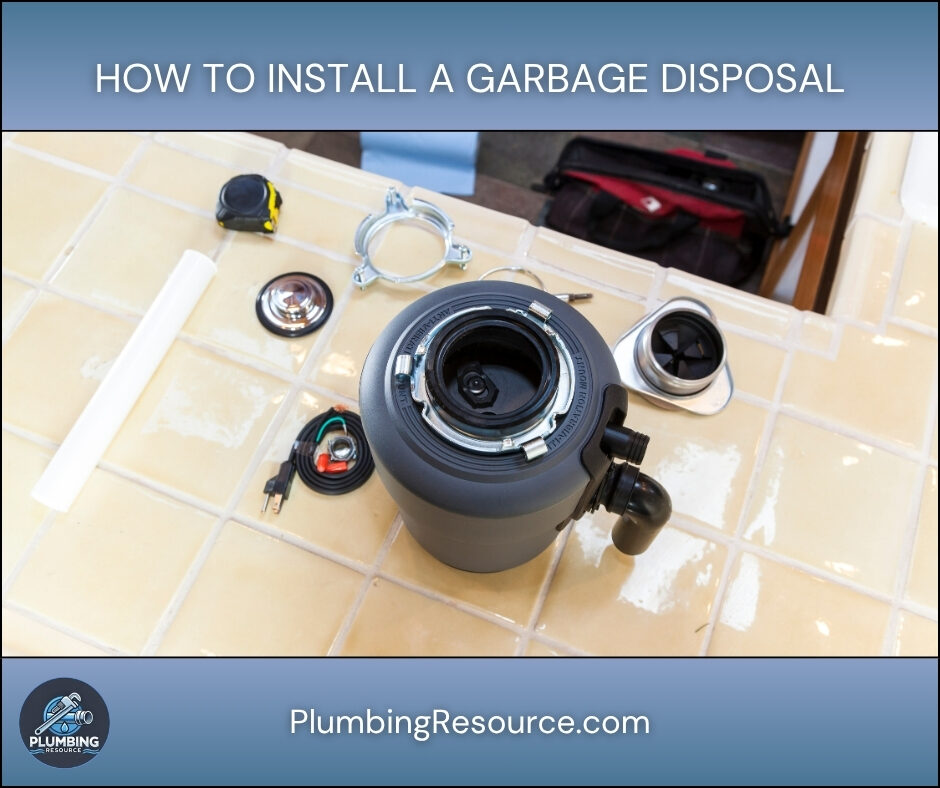
🧰 Tools & Materials
Before you begin, gather all tools and materials.
🔧 Tools
- Adjustable wrench
- Channel-lock pliers
- Screwdrivers
- Bucket
- Towels
- Non-contact voltage tester
- Hammer
- Punch
- Putty knife
- Utility knife
- Flashlight
🧱 Materials
- Garbage disposal unit
- Mounting hardware
- Plumber’s putty or silicone
- Drain fittings
- Dishwasher hose clamp
- Electrical cord kit if required
- Wire nuts
- PVC or tubular drain fittings if needed
🛠️ Step-by-Step Guide: How To Install a Garbage Disposal
1️⃣ Turn Off the Power
First, turn off power at the breaker panel. Then, verify power is off using a voltage tester.
Never work on disposal wiring while the circuit is energized. Electrical shock can occur quickly under wet sink conditions.
If your old disposal plugs into an outlet, unplug it after shutting off the breaker.
2️⃣ Remove the Existing Garbage Disposal
Next, place a bucket underneath the sink because water will spill from the drain.
Disconnect the drain pipe carefully. Then, disconnect the dishwasher hose if one is connected.
Most disposals twist off the mounting ring. Therefore, support the disposal with one hand while rotating it loose.
Garbage disposals can be heavy. Because of this, avoid letting the unit fall suddenly.
After removing the disposal, remove the old mounting assembly from the sink.
3️⃣ Clean the Sink Opening
Now, scrape away old plumber’s putty, silicone, and debris.
The sink surface must be smooth and clean. Otherwise, the new flange may leak after installation.
Use a putty knife carefully so you do not scratch the sink.
How To Install a Garbage Disposal Mounting Assembly
4️⃣ Install the Sink Flange
Roll plumber’s putty into a rope shape. Then, place it underneath the sink flange.
Insert the flange into the sink opening.
Next, move underneath the sink and install the gasket, backup ring, and mounting ring.
Tighten the mounting screws evenly. Additionally, check that the flange remains centered while tightening.
Excess putty should squeeze out around the flange. Remove the excess putty for a clean finish.
If you have a stone or composite sink, use silicone instead of plumber’s putty if the manufacturer recommends it.
5️⃣ Prepare the Garbage Disposal Wiring
Many garbage disposals do not include a power cord.
If your disposal uses a cord, install the cord kit now.
Remove the wiring cover plate. Then, connect:
- Black wire to black wire
- White wire to white wire
- Green wire to ground screw
Afterward, secure the wires with wire nuts.
Finally, reinstall the wiring cover.
If your disposal is hardwired, local electrical codes may require a licensed electrician.
How To Install a Garbage Disposal with a Dishwasher
6️⃣ Remove the Dishwasher Knockout Plug
If your dishwasher drains into the disposal, remove the dishwasher inlet knockout plug.
Use a screwdriver and hammer carefully.
Tap the plug inward until it breaks loose.
Then, remove the loose plug from inside the disposal chamber. Otherwise, the disposal can jam later.
If you do not have a dishwasher connection, skip this step.
7️⃣ Mount the Garbage Disposal
Lift the disposal carefully and align it with the mounting ring.
Then, rotate the disposal until it locks into place.
Most models use a twist-lock mounting system. Therefore, verify all mounting tabs engage fully.
Once mounted, the disposal should feel secure with minimal movement.
How To Install a Garbage Disposal Drain Connection
8️⃣ Connect the Drain Pipe
Attach the discharge tube to the disposal.
Next, connect the P-trap and sink drain piping.
Ensure all washers face the correct direction. Otherwise, leaks may occur immediately.
Tighten slip nuts evenly. However, avoid overtightening plastic fittings because they can crack.
If you have a double-bowl sink, you may need a continuous waste kit.
Additionally, ensure the drain line slopes properly toward the wall drain.
9️⃣ Connect the Dishwasher Drain Hose
Slide the dishwasher hose onto the disposal inlet.
Then, tighten the hose clamp securely.
Also, install a high loop underneath the countertop. This helps prevent dirty sink water from backing into the dishwasher.
Some areas require an air gap instead of a high loop. Therefore, check local plumbing codes.
How To Install a Garbage Disposal Without Leaks
🔟 Test for Leaks
Before restoring power, test all plumbing connections.
Run water into the sink for several minutes.
Then, inspect:
- Sink flange
- Disposal body
- Drain fittings
- Dishwasher connection
- P-trap joints
Even small drips should be corrected immediately.
Additionally, tighten fittings gradually while testing.
1️⃣1️⃣ Restore Power and Test Operation
Turn the breaker back on.
Next, run cold water and switch on the disposal.
The disposal should run smoothly without unusual vibration.
Then, allow water to run for several seconds after shutting off the disposal.
This helps flush food particles through the drain system.
⚠️ Common Mistakes
- Forgetting to turn off power
- Failing to remove the dishwasher knockout plug
- Installing drain washers backward
- Overtightening plastic fittings
- Forgetting the dishwasher high loop
- Leaving old putty underneath the flange
- Supporting the disposal improperly during removal
- Using hot water while grinding food waste
💡 Pro Tips
- Always run cold water during operation.
- Grind food waste gradually instead of all at once.
- Avoid grease, bones, coffee grounds, and fibrous vegetables.
- Use a flashlight while working underneath the sink.
- Test for leaks twice before finishing.
- Tighten mounting screws evenly for a stronger seal.
- Choose a sound-insulated disposal for quieter operation.
🔧 Troubleshooting
Garbage Disposal Hums but Will Not Spin
First, turn off the power.
Then, use the manufacturer’s hex wrench underneath the disposal to rotate the motor manually.
Food debris often jams the grinding plate. Additionally, press the reset button underneath the disposal.
Garbage Disposal Leaks Under the Sink
Check the sink flange first.
Then, inspect drain fittings and discharge tube connections.
Loose slip nuts and damaged washers commonly cause leaks.
Garbage Disposal Drains Slowly
A slow drain usually indicates a clogged trap or drain line.
Therefore, disconnect and clean the P-trap.
Also, avoid placing grease and starchy foods into the disposal.
Garbage Disposal Will Not Turn On
Check:
- Breaker
- GFCI outlet
- Reset button
- Wall switch
- Power cord connection
Additionally, verify the disposal receives power using a voltage tester.
👨🏻🔧 When to Call a Professional
Some installations require professional help.
Call a licensed plumber if:
- The drain piping requires major modifications
- The wall drain height is incorrect
- The disposal leaks internally
- The sink cabinet has water damage
- The disposal repeatedly trips the breaker
- You smell burning from the motor
Additionally, contact a licensed electrician if new wiring or outlet installation is necessary.
❓ FAQ
How long does it take to install a garbage disposal?
Most installations take one to three hours. However, replacement jobs are usually faster.
Can you install a garbage disposal without a dishwasher?
Yes. Simply leave the dishwasher inlet capped.
Is it difficult to install a garbage disposal?
Installing a garbage disposal is manageable for many homeowners. However, plumbing or electrical modifications increase difficulty.
Do you need plumber’s putty when installing a garbage disposal?
Most stainless sinks use plumber’s putty. However, some sink manufacturers recommend silicone instead.
Can you use a garbage disposal with a septic system?
Yes. However, excessive food waste can overload the septic system.
What should not go into a garbage disposal?
Avoid grease, bones, coffee grounds, eggshells, pasta, rice, celery, and fibrous vegetables.
✅ Conclusion
Learning how to install a garbage disposal can save money and improve your kitchen’s functionality. However, proper installation is critical for preventing leaks, drainage issues, and electrical problems. If you follow these steps carefully, you can complete the installation safely and confidently.
👋🏼 Before You Go…
If this guide helped you fix your sink, then save it for future reference. Also, share it with someone dealing with a clogged drain.
And if you want more expert plumbing tips, check out more guides on your site to stay ahead of costly problems.


