If you need to learn how to repair a leaking shower, you must first identify exactly where the leak is coming from. Fortunately, most shower leaks come from a few common areas. Therefore, when you follow a step-by-step process, you can usually find the problem quickly and repair it before serious water damage develops.
A leaking shower can waste water, damage drywall, weaken flooring, and create mold problems behind walls. Moreover, even a small drip can eventually become an expensive repair if ignored. In this guide, you will learn how to diagnose and repair shower leaks in detail, including leaking showerheads, shower valves, drains, trim plates, shower arms, and hidden plumbing leaks.
🔍 Understanding the Project
A leaking shower is considered a plumbing repair because water escapes where it should not. In many cases, the problem develops slowly due to worn seals, damaged cartridges, loose fittings, cracked grout, or corroded plumbing components.
One of the most common causes is a worn shower valve cartridge. Over time, the internal seals wear out. As a result, water continues passing through the valve even when the shower is turned off. Additionally, mineral buildup inside the valve can damage internal parts and prevent proper sealing.
Leaks can also develop around the shower arm, drain assembly, shower pan, or behind the wall. Sometimes, the leak only appears while the shower runs. However, other leaks continue even when the fixture is off.
Common warning signs include:
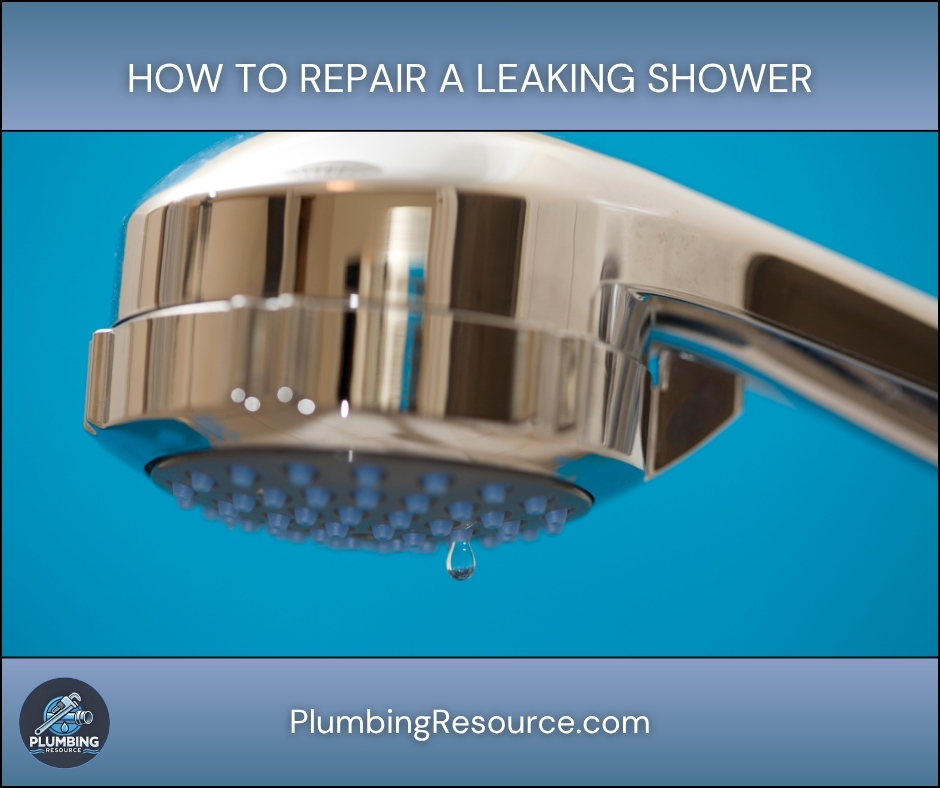
- Dripping from the showerhead
- Water stains on ceilings or walls
- Loose tiles or soft drywall
- Mold or mildew smells
- Water pooling near the shower
- Peeling paint around the bathroom
If you ignore these warning signs, the damage can spread into framing, insulation, flooring, and nearby rooms. Therefore, repairing the leak early helps prevent costly structural repairs later.
🧰 Tools & Materials
- Adjustable wrench
- Channel-lock pliers
- Phillips and flathead screwdriver
- Allen wrench set
- Flashlight
- Utility knife
- Towels or rags
- Bucket
- Plumber’s tape
- Silicone plumber’s grease
- Replacement shower cartridge
- Replacement washers or O-rings
- Silicone caulk
- Replacement showerhead
- Replacement shower arm
- Drain repair parts
- Moisture meter (optional)
🛠️ Step-By-Step Guide: How To Repair a Leaking Shower
1. Identify Where the Shower Is Leaking
Before you repair anything, you must determine the exact leak location. Otherwise, you may replace the wrong parts.
Start by drying the entire shower area completely. Then, inspect these common leak points carefully:
- Showerhead
- Shower arm
- Shower handle
- Trim plate
- Tub spout diverter
- Drain assembly
- Shower corners and grout lines
- Ceiling below the shower
Next, determine when the leak happens.
If the shower leaks even while turned off, the problem usually involves the shower valve cartridge or internal valve seals.
However, if the leak only appears while running the shower, the issue may involve the shower arm, drain, pan, grout, or piping connections.
2. Shut Off the Water Supply
Before you begin disassembly, turn off the water supply.
If your shower has local shutoff valves behind an access panel, use those valves first. Otherwise, shut off the home’s main water supply.
Next, open the shower valve to relieve pressure and drain remaining water from the line.
Additionally, place towels inside the shower to protect surfaces and prevent dropped screws from entering the drain.
3. Remove the Shower Handle and Trim
Most leaking shower repairs involve accessing the valve assembly.
First, locate the handle screw. Sometimes, it hides behind a decorative cap.
Then:
- Remove the decorative cap carefully.
- Unscrew the handle screw.
- Pull the handle off slowly.
- Remove trim plate screws.
- Pull the trim plate away from the wall.
If silicone surrounds the trim plate, cut the seal carefully using a utility knife before removal.
Once removed, inspect the area behind the trim for moisture, corrosion, mold, or water stains.
4. How To Repair a Leaking Shower Valve
The shower valve cartridge is one of the most common leak sources.
Over time, cartridge seals wear down. Consequently, water bypasses the valve and causes dripping from the showerhead.
To replace the cartridge:
- Locate the retaining clip or retaining nut.
- Remove the retaining clip using pliers.
- Pull the cartridge straight out.
- Compare the old cartridge to the replacement.
- Apply plumber’s grease lightly to the new seals.
- Install the new cartridge in the same orientation.
- Reinstall the retaining clip securely.
If the cartridge sticks, use a cartridge puller tool instead of forcing it. Otherwise, you could damage the valve body inside the wall.
After replacement, temporarily turn the water back on and test the valve before reinstalling trim.
5. How To Repair a Leaking Showerhead
Sometimes, the leak comes from the showerhead connection rather than the valve itself.
First, remove the showerhead using an adjustable wrench. Protect the finish with a rag while loosening it.
Next, inspect for:
- Damaged rubber washers
- Cracked fittings
- Mineral buildup
- Worn threads
Remove old plumber’s tape from the threads completely. Then, apply fresh plumber’s tape clockwise around the shower arm threads.
Reinstall the showerhead hand-tight first. Afterward, snug it carefully with a wrench.
Do not overtighten the connection because excessive force can crack the fitting.
6. How To Repair a Leaking Shower Arm
If water leaks behind the wall escutcheon, the shower arm connection may be leaking.
First, remove the showerhead. Then, unscrew the shower arm counterclockwise.
Inspect the threaded connection inside the wall carefully.
If the shower arm is corroded, replace it entirely. Otherwise, clean the threads thoroughly and apply fresh plumber’s tape.
Thread the arm back into the drop-ear fitting slowly. Then, tighten until properly aligned.
Finally, reinstall the escutcheon and showerhead.
7. How To Repair a Leaking Shower Drain
If water appears downstairs or around the shower floor, the drain assembly may be leaking.
To test the drain:
- Plug the drain.
- Fill the shower base with a small amount of water.
- Wait 15–20 minutes.
If leaking occurs during this test, the drain or shower pan may be compromised.
Remove the drain cover and inspect the drain body for cracks, loose fittings, or deteriorated gaskets.
In some cases, tightening the drain body solves the problem. However, damaged drain seals usually require replacement.
If the shower pan itself leaks, professional repair or replacement may be necessary.
8. Inspect for Hidden Wall Leaks
Sometimes, the actual leak hides behind the wall.
Check nearby rooms and ceilings for:
- Soft drywall
- Bubbling paint
- Mold smells
- Swollen trim
- Water stains
If accessible, open the access panel behind the shower. Then, run the shower while inspecting the plumbing connections.
Look carefully for:
- Dripping fittings
- Loose threaded joints
- Corroded piping
- Spray leaks
- Water tracking along framing
Because hidden leaks can cause severe structural damage, repair them immediately once identified.
9. Reinstall the Trim and Test Everything
After completing repairs:
- Reinstall the trim plate.
- Apply silicone caulk around the top and sides.
- Leave the bottom edge unsealed for drainage.
- Reinstall the handle securely.
- Turn the water back on slowly.
Then, test all functions carefully.
Run hot and cold water separately. Additionally, inspect all repaired areas while the shower runs.
Finally, turn the shower off and confirm that dripping stops fully.
⚠️ Common Mistakes
- Replacing the showerhead without diagnosing the valve
- Forgetting to shut off the water
- Overtightening threaded fittings
- Using too much plumber’s tape
- Ignoring hidden wall moisture
- Caulking the entire trim plate edge shut
- Installing the cartridge backward
- Using incorrect replacement parts
💡 Pro Tips
- Take the old cartridge to the store for exact matching.
- Photograph the valve before disassembly.
- Use silicone plumber’s grease on rubber seals.
- Replace worn trim gaskets during repairs.
- Inspect nearby drywall for hidden moisture.
- Test repairs before reinstalling all trim pieces.
🔧 Troubleshooting
The shower still drips after replacing the cartridge
The replacement cartridge may be incorrect or installed backward. Therefore, remove it and verify orientation carefully.
Water leaks behind the trim plate
The trim gasket may be damaged. Additionally, the valve body connection inside the wall could be leaking.
Water leaks only while showering
The leak may involve the shower arm, grout, drain assembly, or shower pan.
The cartridge will not come out
Mineral buildup may have seized the cartridge. Use a proper cartridge puller tool instead of excessive force.
👨🏻🔧 When to Call a Professional
You should contact a licensed plumber if:
- The leak is inside the wall
- The shower pan is damaged
- Mold damage is visible
- The valve body is cracked
- Pipes require soldering
- The leak source remains unclear
- Water damage has spread to nearby rooms
Additionally, professional repair may help prevent future structural damage and hidden mold growth.
❓ FAQ
How to repair a leaking shower that drips constantly?
Most constant shower drips come from a worn valve cartridge or damaged internal seals. Replacing the cartridge usually solves the issue.
Can a leaking shower cause mold?
Yes. Even slow leaks can create moisture behind walls. Consequently, mold and mildew can develop over time.
How do I know if my shower drain is leaking?
If water appears downstairs or near the shower floor only during use, the drain assembly or shower pan may be leaking.
Is repairing a leaking shower difficult?
Some repairs are straightforward. However, hidden piping leaks and shower pan problems are more advanced.
Should I caulk around the shower trim plate?
Yes, but only around the top and sides. Leave the bottom open so trapped water can escape.
✅ Conclusion
Learning how to repair a leaking shower helps you prevent water damage, reduce wasted water, and protect your bathroom from larger plumbing problems. Fortunately, when you diagnose the leak correctly and follow a careful step-by-step process, many shower leaks can be repaired successfully without major demolition.
👋🏼 Before You Go…
If this guide helped you fix your sink, then save it for future reference. Also, share it with someone dealing with a clogged drain.
And if you want more expert plumbing tips, check out more guides on your site to stay ahead of costly problems.


