Water around your water heater can become a major problem fast. Therefore, learning How To Fix a Water Heater Leak can help you prevent expensive water damage, mold growth, and system failure. Some leaks come from loose fittings, while others indicate a failed tank that requires replacement.
In this guide, you will learn how to identify the leak source, repair common problems, and determine when professional help is necessary.
🔍 Understanding the Project
Water heater leaks happen for several reasons. For example, corrosion, loose fittings, excessive pressure, worn valves, and damaged heating elements commonly cause leaks. In addition, aging tanks can eventually rust through internally.
You may notice warning signs before a major leak develops. Common signs include:
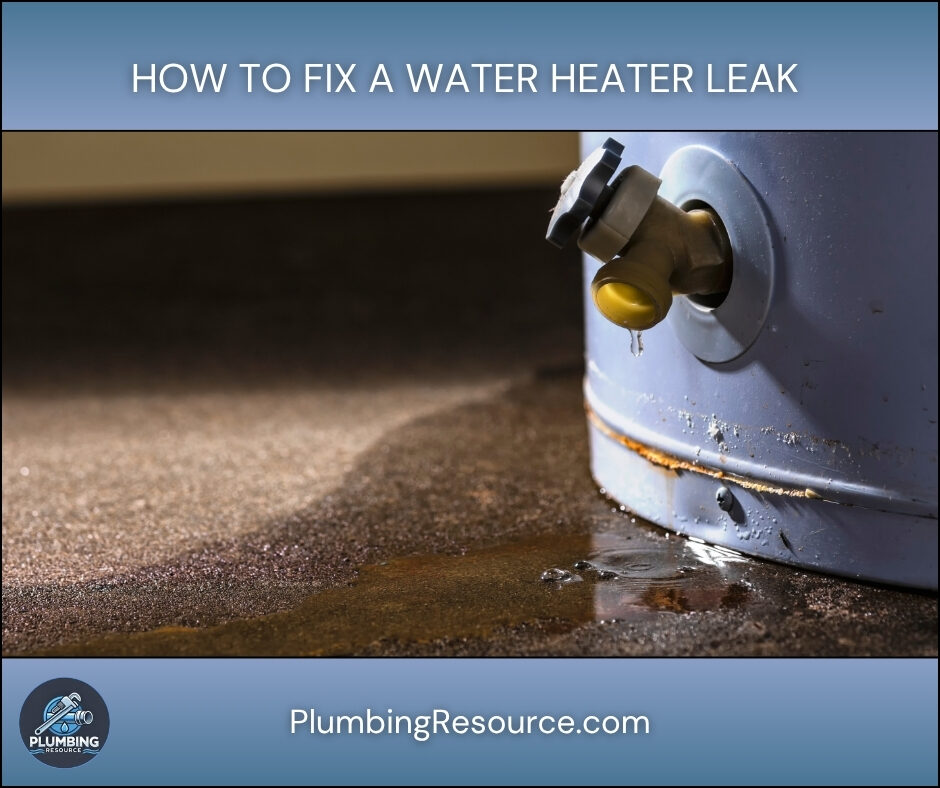
- Water pooling around the heater
- Rust stains on the tank
- Dripping from pipes or valves
- Reduced hot water performance
- Popping or rumbling sounds
- Moisture around fittings
Ignoring a leak can create serious problems. Over time, water damage can ruin flooring, walls, and nearby electrical components. Furthermore, a leaking tank can suddenly burst and flood the surrounding area.
Because leaks vary widely, you must first identify exactly where the water originates before making repairs.
🧰 Tools & Materials
- Adjustable wrench
- Pipe wrench
- Channel-lock pliers
- Screwdrivers
- Garden hose
- Bucket
- Towels or rags
- Flashlight
- PTFE thread tape
- Pipe thread sealant
- Replacement T&P relief valve
- Replacement drain valve
- Replacement water supply connectors
- Heating element wrench
- Voltage tester
- Replacement heating element gasket
- Wet/dry vacuum
🛠️ Step-By-Step Guide: How To Fix a Water Heater Leak
1️⃣ Turn Off the Power or Gas
Safety always comes first. Therefore, shut off all power before touching the water heater.
For electric water heaters:
- Turn off the breaker at the electrical panel.
- Verify power is off with a voltage tester.
For gas water heaters:
- Turn the gas control valve to the OFF position.
- If you smell gas, leave the area immediately and contact the gas company.
This step prevents electrical shock, burns, and fire hazards.
2️⃣ Shut Off the Water Supply
Locate the cold water shut-off valve above the heater. Then, turn the valve clockwise until it fully closes.
If the valve will not close completely:
- Shut off the home’s main water supply.
- Open a nearby hot water faucet to relieve pressure.
Reducing water flow helps minimize additional leakage while you diagnose the problem.
3️⃣ Dry the Water Heater Completely
Leaks can travel along pipes and surfaces. Therefore, dry the entire heater before locating the source.
Use towels or a wet/dry vacuum to remove water from:
- The top of the tank
- Water connections
- Side panels
- The floor underneath
Next, wait several minutes and monitor where moisture returns first.
4️⃣ Inspect the Water Supply Connections
Many leaks originate from the hot or cold water connections above the heater.
Look for:
- Corrosion
- Mineral buildup
- Loose flex connectors
- Dripping threaded fittings
If a fitting appears loose:
- Hold the pipe steady with one wrench.
- Tighten the connector carefully with another wrench.
Do not overtighten fittings because excessive force can crack older piping.
If the connection still leaks:
- Remove the connector
- Apply fresh PTFE tape and pipe sealant
- Reinstall the fitting securely
5️⃣ Check the Temperature and Pressure Relief Valve
The temperature and pressure relief valve, also called the T&P valve, protects the heater from dangerous pressure buildup.
This valve usually sits on the side or top of the tank with a discharge pipe attached.
If water drips from the valve:
- The valve may be defective
- Water pressure may be too high
- The heater may be overheating
To test the valve:
- Place a bucket under the discharge pipe
- Lift the test lever briefly
- Release the lever completely
If water continues dripping afterward, replace the valve.
6️⃣ Replace a Faulty T&P Relief Valve
If the valve continues leaking, replacement is often necessary.
First:
- Shut off water and power
- Drain several gallons from the tank
Then:
- Remove the discharge pipe
- Unscrew the old valve
- Apply thread tape to the new valve
- Install and tighten the replacement valve
- Reattach the discharge pipe
Afterward, refill the heater and check for leaks.
7️⃣ Inspect the Drain Valve
The drain valve sits near the bottom of the tank. Over time, sediment and wear can cause this valve to leak.
Common drain valve leaks include:
- Dripping from the spout
- Seeping around the threads
- Cracked plastic valves
Sometimes tightening the valve slightly stops the leak. However, damaged valves usually require replacement.
8️⃣ Replace a Leaking Drain Valve
To replace the drain valve:
- Turn off water and power
- Connect a garden hose to the drain valve
- Drain the tank below valve level
Next:
- Remove the old valve carefully
- Apply PTFE tape to the new valve
- Install the replacement valve
- Tighten securely without overtightening
Many plumbers prefer brass replacement valves because they last longer than plastic versions.
9️⃣ Inspect Electric Heating Elements
Electric water heaters contain upper and lower heating elements mounted through the tank wall.
Sometimes the gasket around the element leaks.
Remove the access panels and inspect for:
- Rust streaks
- Water around the element
- Damp insulation
If the gasket leaks, replace the heating element gasket or the entire element.
🔟 Replace a Leaking Heating Element
First, verify the breaker remains OFF.
Then:
- Drain water below the leaking element
- Disconnect electrical wires
- Use an element wrench to remove the element
- Install a new gasket or replacement element
- Tighten evenly
Afterward:
- Refill the tank fully
- Purge air from the system
- Restore electrical power
Never energize an empty water heater because dry-firing can destroy the element instantly.
1️⃣1️⃣ Inspect the Tank for Corrosion
If water leaks directly from the tank body, the tank has likely failed internally.
Signs of tank failure include:
- Rusty water
- Corrosion around the bottom seam
- Water dripping from underneath insulation
- Moisture at the tank base
Unfortunately, internal tank corrosion cannot be repaired reliably.
1️⃣2️⃣ Replace the Water Heater if the Tank Has Failed
Once the tank itself leaks, replacement becomes the only permanent solution.
Most residential water heaters last:
- 8–12 years on average
- Longer with proper maintenance
When replacing the unit, consider:
- Tank size
- Fuel type
- Recovery rate
- Energy efficiency
- Expansion tank requirements
In many cases, upgrading to a newer model reduces future repair issues and energy costs.
⚠️ Common Mistakes
- Ignoring small leaks until major damage occurs
- Restoring power before refilling the tank
- Overtightening fittings
- Reusing damaged connectors
- Forgetting to relieve water pressure
- Assuming all leaks mean tank failure
- Ignoring high water pressure issues
💡 Pro Tips
- Inspect your water heater monthly for moisture.
- Flush sediment from the tank yearly.
- Install a drain pan if the heater sits indoors.
- Replace old flex connectors during repairs.
- Keep the thermostat around 120°F to reduce stress on the system.
- Install a water alarm near the heater for early leak detection.
🔧 Troubleshooting
Water Continues Leaking After Tightening Connections
The fitting may have damaged threads or corrosion. Therefore, remove the connection and reseal it properly.
T&P Valve Keeps Dripping
High water pressure or thermal expansion may exist. In addition, a failed expansion tank can cause repeated valve discharge.
Water Appears Under the Heater Only During Heating
Condensation may form temporarily during heating cycles. However, persistent water usually indicates a real leak.
No Hot Water After Repair
For electric heaters, verify the breaker is on and the tank is completely full. For gas heaters, confirm the pilot light remains lit.
👨🏻🔧 When to Call a Professional
Contact a licensed plumber if:
- The tank itself is leaking
- You smell gas near the heater
- Electrical wiring appears damaged
- Water pressure exceeds safe levels
- The leak source remains unclear
- Corrosion affects multiple components
Professional diagnosis can prevent larger plumbing and structural problems later.
❓ FAQ
How To Fix a Water Heater Leak From the Bottom?
First, determine whether the drain valve, condensation, or tank itself causes the leak. If the tank body leaks, replacement is usually necessary.
Can I Still Use a Leaking Water Heater?
Small leaks may temporarily allow operation. However, continued use increases the risk of flooding and system failure.
How To Repair a Leaking Water Heater Connection?
Turn off water and power first. Then, tighten the fitting or reseal the threaded connection using PTFE tape and pipe sealant.
Why Is My Water Heater Relief Valve Leaking?
High pressure, overheating, or a faulty valve commonly causes T&P valve leaks.
How Long Does a Water Heater Last?
Most residential units last between 8 and 12 years. However, maintenance and water quality greatly affect lifespan.
✅ Conclusion
Learning How To Fix a Water Heater Leak helps you prevent water damage, improve safety, and extend the life of your plumbing system. Some leaks require simple repairs, while others indicate serious tank failure.
By identifying the leak source carefully and following the proper repair steps, you can solve many common water heater leak problems before they become emergencies.
👋🏼 Before You Go…
If this guide helped you, save it for future reference and share it with someone dealing with water heater problems. A small leak today can become a major repair tomorrow.


