Replacing a water heater can seem overwhelming at first. However, if you understand the process and prepare correctly, the project becomes much easier to manage. This guide explains how to replace a water heater step by step so you can understand the tools, safety concerns, installation process, and common mistakes before you begin.
A failing water heater can leak, stop producing hot water, or increase energy bills. Therefore, replacing the unit before it completely fails can help prevent water damage and plumbing emergencies. In addition, upgrading to a newer model can improve efficiency and provide more reliable hot water throughout your home.
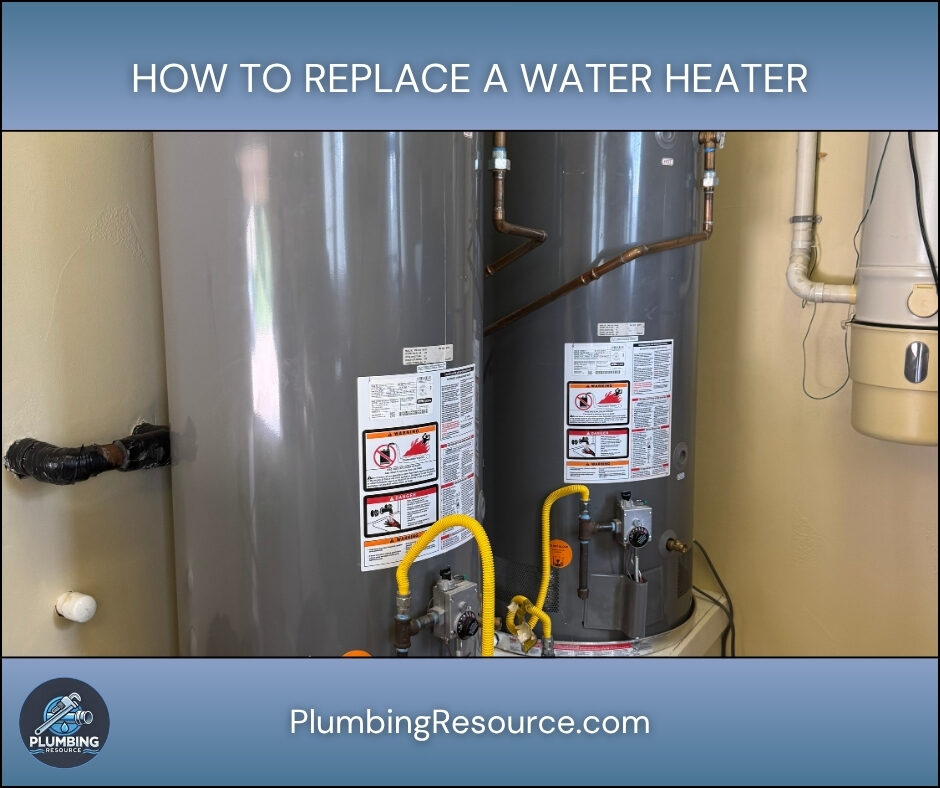
🔍 Understanding the Project
Water heaters eventually wear out because of corrosion, sediment buildup, and constant heating cycles. Most traditional tank-style units last between 8 and 12 years. However, poor water quality and lack of maintenance can shorten that lifespan.
Common signs replacement is needed include:
- Rust-colored hot water
- Water leaking around the tank
- Rumbling or popping sounds
- Inconsistent hot water
- Reduced hot water capacity
- Frequent repairs
Before you replace the unit, you should confirm compatibility with your existing plumbing and utility connections. For example, you must match the fuel type, tank size, voltage requirements, venting style, and physical dimensions.
In addition, replacing an older unit with a newer model can improve energy efficiency and lower operating costs. Modern units also recover faster and often provide better insulation.
🧰 Tools & Materials
- Adjustable wrench
- Pipe wrench
- Channel-lock pliers
- Screwdrivers
- Garden hose
- Bucket
- Tubing cutter
- Pipe thread sealant
- Teflon tape
- Voltage tester
- Drill and bits
- Level
- New water heater
- Flexible water supply connectors
- Gas flex connector
- Drain pan
- T&P relief valve (if not included with water heater)
- Dielectric unions
- Expansion tank
- Pipe insulation
- Safety gloves
- Safety glasses
🛠️ Step-By-Step Guide: How To Replace a Water Heater
1️⃣ Turn Off the Power or Gas
First, shut off power to the water heater.
For electric heaters:
- Turn off the breaker at the electrical panel.
- Then verify power is off using a voltage tester.
For gas heaters:
- Turn the gas control valve to the OFF position.
- Next, shut off the gas supply valve near the unit.
This step is critical because working on an energized heater can cause serious injury.
2️⃣ Shut Off the Water Supply
Locate the cold water shutoff valve above the heater.
Turn the valve clockwise until it stops. If the valve fails or leaks, shut off the main water supply to the home instead.
Next, open a nearby hot water faucet. This helps relieve pressure inside the plumbing system.
3️⃣ Drain the Old Water Heater
Connect a garden hose to the drain valve near the bottom of the tank.
Then run the hose to:
- A floor drain
- A utility sink
- An outdoor area with proper drainage
Open the drain valve slowly. In addition, leave the nearby hot faucet open so air can enter the system.
If the tank drains slowly, sediment may be blocking the valve. Therefore, briefly opening the cold water supply can help flush debris out.
4️⃣ Disconnect the Water Lines
After the tank drains, disconnect the hot and cold water lines.
If the unit uses flexible connectors:
- Loosen the fittings with adjustable wrenches.
If the plumbing is hard-piped:
- Cut the copper pipe using a tubing cutter.
Keep a bucket nearby because some water usually remains inside the lines.
5️⃣ Disconnect the Gas Line or Electrical Wiring
For gas heaters:
- Disconnect the gas flex line carefully.
- Then cap or secure the gas pipe if needed.
For electric heaters:
- Remove the electrical access cover.
- Disconnect the wire connections.
- Secure the wires safely away from the work area.
If you are uncomfortable with gas or electrical work, contact a licensed professional instead.
6️⃣ Remove the Vent Pipe
Gas water heaters include a vent pipe that removes combustion gases.
Remove the screws securing the vent hood and vent pipe. Then carefully lift the vent away from the heater.
Inspect the vent for:
- Rust
- Corrosion
- Loose connections
- Improper slope
Damaged venting should always be replaced.
7️⃣ Remove the Old Water Heater
Carefully move the old unit out of position.
Water heaters remain heavy even after draining. Therefore, using a dolly can make removal much safer.
Move slowly and protect surrounding walls and flooring during removal.
8️⃣ Position the New Water Heater
Place the new heater in the correct location.
Make sure:
- The unit sits level
- Connections face the correct direction
- Required clearances are maintained
If local code requires a drain pan, install it before setting the heater in place.
9️⃣ Install the T&P Relief Valve
Most new units include a temperature and pressure relief valve.
If yours does not:
- Install the valve into the designated opening.
- Apply thread sealant to threaded fittings.
Next, connect the discharge pipe and route it downward toward an approved drain location.
Never cap or block this pipe.
1️⃣0️⃣ Connect the Water Lines
Reconnect the cold and hot water lines to the new heater.
Flexible connectors simplify installation because they allow slight adjustments during alignment.
Use:
- Teflon tape
- Pipe sealant
- Dielectric unions where required
Then tighten all fittings securely without overtightening them.
1️⃣1️⃣ Connect the Gas Line or Electrical Wiring
For gas units:
- Connect the gas flex line.
- Then tighten fittings carefully using two wrenches.
Afterward, test every connection with a soap-and-water solution. If bubbles appear, a gas leak exists.
For electric units:
- Reconnect wiring according to manufacturer instructions.
- Then reinstall the electrical cover plate.
1️⃣2️⃣ Reinstall the Vent Pipe
Reconnect the vent pipe to the draft hood.
Make sure:
- The vent slopes upward
- Screws secure each connection
- The pipe aligns correctly
Poor venting can allow dangerous gases into the home. Therefore, inspect this section carefully.
1️⃣3️⃣ Fill the New Water Heater
Open the cold water supply valve slowly.
Then leave a nearby hot faucet open while the tank fills. This allows trapped air to escape from the system.
Once water flows steadily from the faucet, close the faucet.
Check all plumbing connections carefully for leaks.
1️⃣4️⃣ Restore Power or Gas
For electric units:
- Turn the breaker back on only after the tank is completely full.
For gas units:
- Turn the gas supply back on.
- Then relight the pilot according to manufacturer instructions.
Set the thermostat to approximately 120°F for efficiency and safety.
1️⃣5️⃣ Test the Water Heater
Allow the heater time to warm the water.
Then test:
- Hot water production
- Water pressure
- Leak-free connections
- Proper burner operation
- Proper vent drafting
In addition, monitor the heater during the first heating cycle for unusual sounds or leaks.
⚠️ Common Mistakes
- Forgetting to shut off power before disconnecting wiring
- Turning on an electric heater before filling the tank
- Overtightening fittings
- Reusing damaged connectors
- Ignoring local plumbing codes
- Installing incorrect venting materials
- Failing to test gas connections for leaks
- Using the wrong tank size
💡 Pro Tips
- Replace old shutoff valves during installation if they are corroded.
- Install an expansion tank if your plumbing system requires one.
- Insulate hot water lines to improve efficiency.
- Flush the new heater annually to reduce sediment buildup.
- Take photos before disconnecting anything for reference later.
🔧 Troubleshooting
Water Heater Is Not Heating
- Verify power or gas supply is active.
- Check breaker position or pilot light status.
- Confirm thermostat settings.
Water Leaks Around Fittings
- Tighten fittings slightly.
- Reapply thread sealant if needed.
- Inspect connectors for damage.
Pilot Light Will Not Stay Lit
- Check the thermocouple connection.
- Confirm gas supply pressure.
- Inspect for venting issues.
Hot Water Runs Out Too Fast
- Verify tank size matches household demand.
- Check dip tube condition.
- Inspect heating elements or burner performance.
👨🏻🔧 When to Call a Professional
You should contact a licensed plumber if:
- Gas piping modifications are required
- Venting does not meet code
- Electrical upgrades are needed
- The heater is located in a tight attic or crawlspace
- Water damage exists around the installation area
- The installation involves a tankless system
- You are unsure about local permit requirements
Professional installation can also help ensure warranty compliance and code approval.
❓ FAQ
How long does it take to replace a water heater?
Most standard water heater replacements take between 2 and 4 hours. However, difficult installations may take longer.
Can you replace a water heater yourself?
Yes, many homeowners can learn how to replace a water heater. However, gas lines and electrical work may require professional assistance.
How do I know what size water heater to replace?
Check the gallon capacity on the old unit. Then consider household size and hot water usage before selecting a replacement.
How often should you replace a water heater?
Most tank-style heaters last 8–12 years. However, heavy use and hard water can shorten lifespan.
Should I replace my water heater before it leaks?
Yes. Replacing the unit early helps prevent flooding, water damage, and emergency repairs.
✅ Conclusion
Learning how to replace a water heater helps you understand the entire installation process before starting the project. With proper preparation, careful installation, and attention to safety, you can replace a failing unit and restore reliable hot water to your home.
In addition, understanding common mistakes and troubleshooting steps can help prevent costly problems later.
👋🏼 Before You Go…
If this guide helped you understand how to replace a water heater, save this page for future reference. Also, share it with someone who may need help planning their next plumbing project.


